This article, embroidering on a sock, explains how to embroider on a sock with a large frame, therefore with any machine.
Ideally, one should have access to a machine with a small arm (for example like our Brother PR1050X). Thus, embroidering on a sock will be very simple. You can also wedge a sock in a small 5x5cm frame of a machine with a big free arm like our Elna 8300 (already less elegant solution). Most modern consumer embroiderers either don’t have a free arm or it’s too big for a sock. Sometimes the small frames delivered as standard are missing.
The safety pin method
It is possible to embroider on a sock or similar object by securing it with pins.
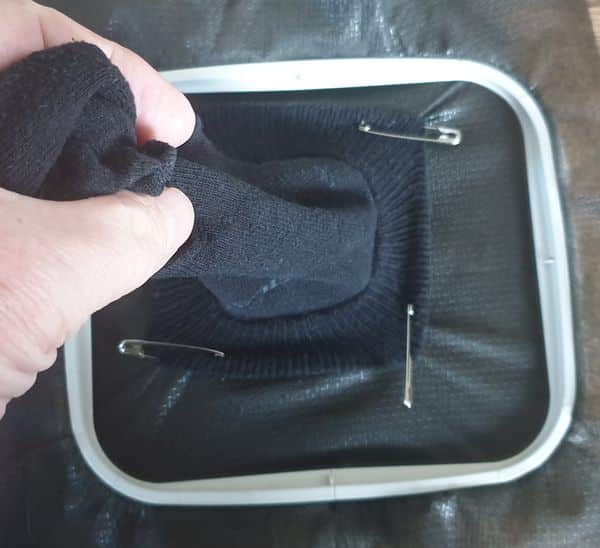
1) Circle a solid stabilizer, preferably polyester. Tighten well (but without breaking the frame).
2) Optional:
If your frame is thin or broken, you should fix the stabilizer with pins (see the photos below where you can see that the stabilizer has been attached at the top and bottom).
You can also turn the sock over and pull just the top side. After tests and reflection it works better (but I didn’t have time to redo the photos….)
3) Tie the top of the sock
Start by fixing the 2 corners of the side you want to embroider, therefore the top of the sock which must be in front.
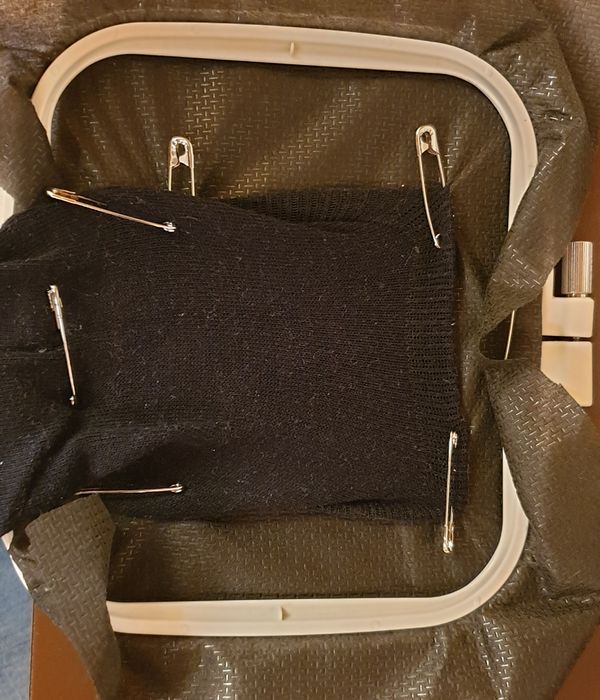
Then attach the 2 opposite corners as in the following image.
In both cases, pull the sock slightly, but not too much, otherwise the embroidery will fold!
Attach the sock to the four corners of the hole with safety pins.
4) Pull the surface to be embroidered (therefore the top) downwards and fix.
It is important that the fabric to be embroidered is flat and that nothing gets stuck underneath (otherwise you will no longer be able to fit into your sock). You have to pinch the fabric about halfway between the fixing points at the bottom (see point 3) and the top and pull well!
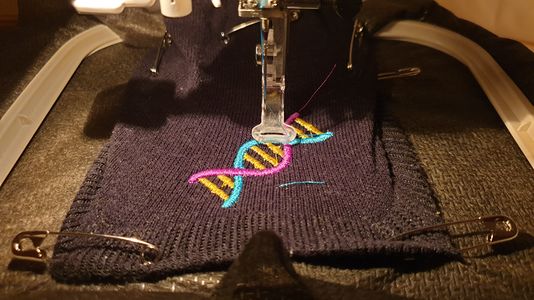
Attach this drawn surface and embroider. You need at least three pins: One down, one left and one right. The following photo already shows a left and right attachment. On the left we see a pin that we used in step 3.
Here is a drinkable result (our second attempt). You can clearly see the surface to be embroidered.
Pull the sock down and secure with safety pins.
5) Embroider ….
Tips:
Obviously it is difficult to do precision embroidery. So you have to either work with airy designs or overlap embroidery surfaces to avoid gaps. Also avoid too tight satins (2mm is a minimum)
Do not exceed an area of 5x4cm for an adult sock
Related Posts
Discover relevant articles, tutorials, and tips to improve your skills and explore new techniques.
Stay inspired and connected to our embroidery community.

