Mastering Minky: A Guide to Sewing with This Soft and Luxurious Fabric
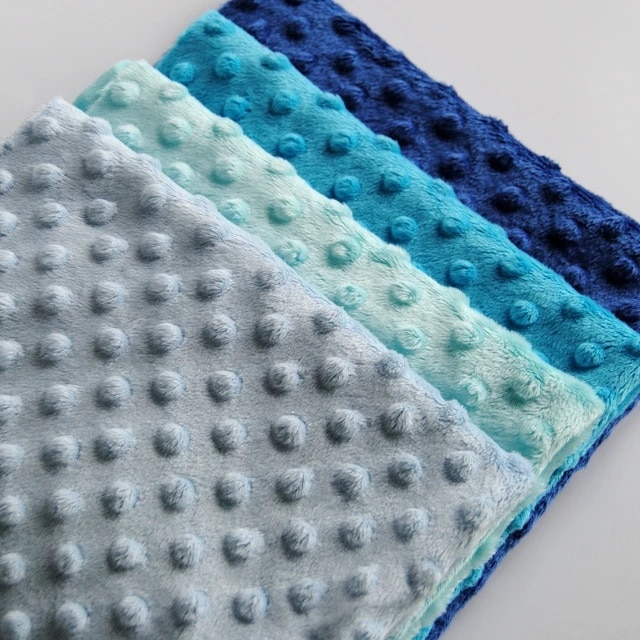
Minky, also known as minkee, is a cuddly and plush fabric that has gained immense popularity among sewers and crafters. Its soft, velvety texture and vibrant colors make it ideal for creating a wide range of projects, from baby blankets and stuffed animals to pillows and home décor accents. However, sewing minky can be a bit tricky due to its slippery surface and tendency to stretch. But with a few simple tips and tricks, you can conquer this luxurious fabric and create stunning handmade masterpieces.
Essential Tools for Minky Sewing
-
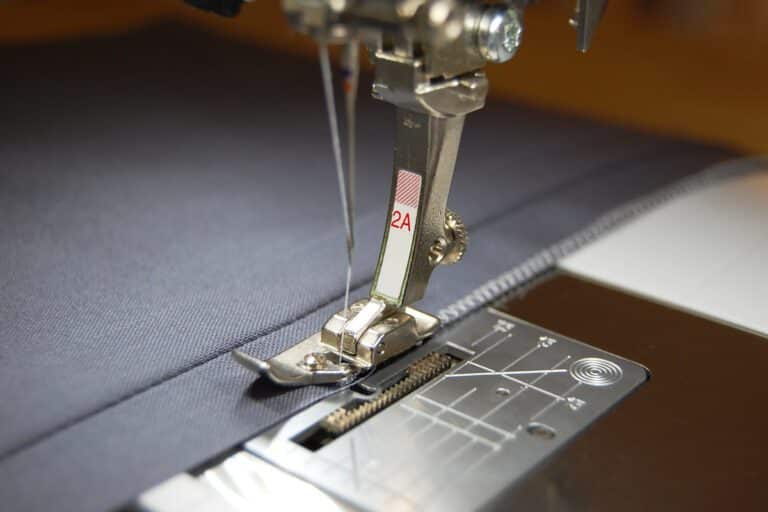
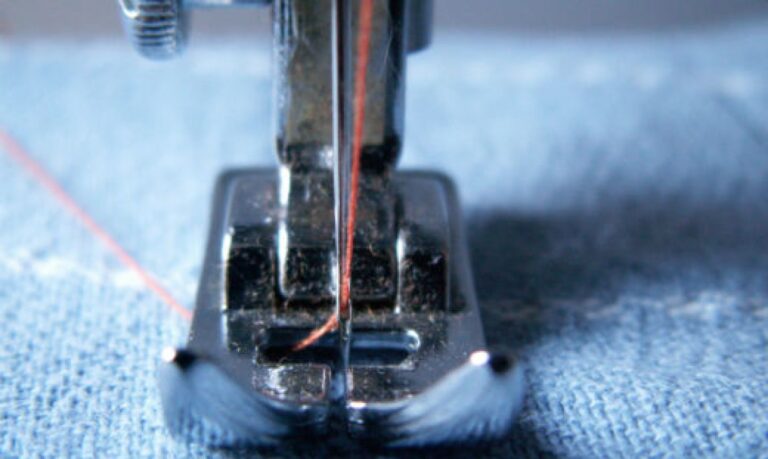
Walking Foot: This specialized sewing machine foot helps evenly feed both the top and bottom layers of fabric, preventing slipping and puckering, especially when sewing minky with other fabrics.
-
Sharp Scissors: Invest in a pair of sharp fabric scissors to ensure clean, precise cuts. Dull scissors can fray and stretch minky, making it difficult to sew.
-
Heavy-Duty Thread: Choose a strong thread that can handle the weight of minky without breaking. Suggested threads include cotton, polyester, or a polyester blend designed for knit fabrics.
-
Pins: Pinning minky is crucial to prevent shifting and misaligned seams. Use lots of pins, spaced about 1 inch apart to keep your project in place.
Sewing Techniques for Minky Perfection
-
Cut with Care: Handle minky gently when cutting. Avoid stretching the fabric to maintain its shape and prevent fraying.
-
Pin Frequently: Pin generously to prevent minky from shifting or bunching during sewing.
-
Low Thread Tension: Use a slightly lower thread tension than you would for traditional fabrics to accommodate minky’s thickness.
-
Walking Foot and Slow Speed: Engage the walking foot and sew at a slow speed to ensure even feeding and prevent slipping.
-
Avoid Ironing: Minky should not be ironed directly, as it can melt or scorch. If ironing is necessary, use a low heat setting and a pressing cloth between the fabric and the iron.
Common Mistakes to Avoid
-
Overstretching: Avoid stretching minky when cutting or handling to prevent puckering and distortion.
-
Threading the Needle Improperly: Ensure the thread is threaded correctly through the machine and needle to avoid tangles and skipped stitches.
-
Sewing Too Quickly: Sewing at a fast speed can cause minky to bunch up or pucker. Maintain a slow and controlled pace.
-
Neglecting Pins: Pins are your best friend when sewing minky. Don’t skimp on pinning to prevent shifting and misaligned seams.
-
Ironing Directly: Never iron minky directly, as it can melt or scorch. Use a pressing cloth and low heat if ironing is necessary.
Minky Projects for Beginners
-
Stuffed Animal: A classic beginner project, stuffed animals allow you to practice sewing curves and working with minky’s texture.
-
Baby Blanket: A soft and cuddly baby blanket is a great way to showcase minky’s luxurious feel and provide warmth to little ones.
-
Plush Pillow: A plush pillow is a simple yet elegant project that showcases minky’s ability to enhance any room décor.
-
Home Décor Accents: Use minky to create decorative accents like pom-poms, tassels, or wall hangings for a touch of whimsy and charm.
Embrace the soft allure of minky and embark on a journey of creative sewing adventures. With these tips, techniques, and inspiration, you’ll be crafting stunning minky projects in no time. Remember, patience, practice, and a touch of imagination are key to mastering this versatile and delightful fabric.
The minkee or minky is undoubtedly the star fabric of creations for children, but not only! We use it and we abuse it, because it is a pleasant to the touch fabric that is available to satisfy all tastes. It is often found in the production of comforters, plaids, washable diapers, etc.
So, to succeed in sewing minkee, whatever your level of sewing, we invite you to discover more about this fabric and we explain how to proceed.
Summary
What is minkee?
The minky is a polyester fabric. It is characterized by its great softness and for good reason, it is a short velvet fabric. It is frequently found with polka dots or stripes. The patterns are then formed by alternating longer hairs and short hairs.
minkee or minky
It also exists in corduroy, it is the same principle that is used for its creation: the shorter hairs draw a line then, next to it, the longer hairs draw a line in relief and so on. There is also short-haired, the velvet then has a smooth appearance. The back of the minkee is made of a jersey weft.
What to do with minky?
The minkee can be used to make many accessories, but also clothes.
We can imagine a very soft blanket for a baby or small slippers, a backpack for a child or even a stuffed animal. On the clothing side, it can be used for the little ones, for example, for the realization of a very warm and comfortable scalable harem pants for the winter, a jacket, etc.
It can also be used for the creation of children’s clothes, for example, opt for a very cozy hoodie. Does this fabric appeal to you? It is not reserved for the youngest, you too can enjoy its comfort.
It can certainly be used for clothes for the home, but also for making a sports outfit or a garment for the winter. The minkee comes in so many forms that you can imagine everything.
In addition to this, it is now possible to find very cool models that will allow you to make original creations. It is a fluid, supple and very soft fabric that will lend itself to many projects that will be very pleasant to wear. Last but not least, it is a fabric that does not shrink. It is for all these reasons that it quickly became the star of velvet fabrics.
Minkee maintenance
The minky is made of hot pressed fabric. As a result, the heat may damage it.
You can therefore machine wash it without problem, provided, however, that you remember to set the temperature to 30°. However, we do not recommend the dryer. It is best to let it air dry. Especially since it is a fabric that dries quite quickly.
Finally, for ironing, it is generally not necessary. However, if at some point you need to iron it, be sure to set the iron to a low temperature and work on the wrong side of the fabric. Its maintenance is ultimately quite easy.
Prepare and cut
If you have chosen to combine your minkee with another fabric, to make a lining, for example, remember to wash this second material well. Indeed, the minkee may not be washed before being cut, because it does not shrink. However, the fabric or fabrics that will be used with it may shrink. It is therefore important to put them in the washing machine beforehand, to avoid any unpleasant surprises.
In a second step, locate the direction of the hair especially for a garment, a stuffed animal, etc. To recognize it, it is enough to caress the fabric and to look in which direction the hair lies down. This will allow you to cut the fabric in the right direction, that is to say in the direction where the hair lies down.
Finally, place your minky upside down to trace your elements. You can use an erasable marker for this. It will allow you to transfer your pattern without stretching your fabric. If you have a rotary cutter, it will allow you to cut leaving your fabric flat. Otherwise, be careful not to pull on the fabric when cutting. If you cut two layers of fabric, do not hesitate to pin them generously to prevent them from moving. Once cut, roll your elements or keep them flat so as not to risk finding them deformed when sewing them.
Sew the minkee
Pinning: Again, it is essential to properly pin your different elements or, better yet, you can build them. This prevents the fabric from slipping when you sew.
Which thread and which needle? It is necessary to use a thread and a needle suitable for minkee fabric. You can opt for a 100% polyester thread.
How to set up and use the sewing machine. Equip your sewing machine with a dual feed presser foot. It is a foot that is equipped with feed dogs to hold the fabric and, thus, to advance it regularly without risking creating folds. If you use your usual presser foot, as the minkee is a slippery fabric, it will not be fed in the same way, which could be awkward and seriously complicate your work. If you do not want to buy an additional presser foot, it is possible to use tissue paper that you slip between the fabric and the feed dogs. You will then have to remove it once the sewing is finished.
The stitching. If you want to topstitch your work, be sure to topstitch in the direction the pile lies for a beautiful result.
Related Posts
Discover relevant articles, tutorials, and tips to improve your skills and explore new techniques.
Stay inspired and connected to our embroidery community.
