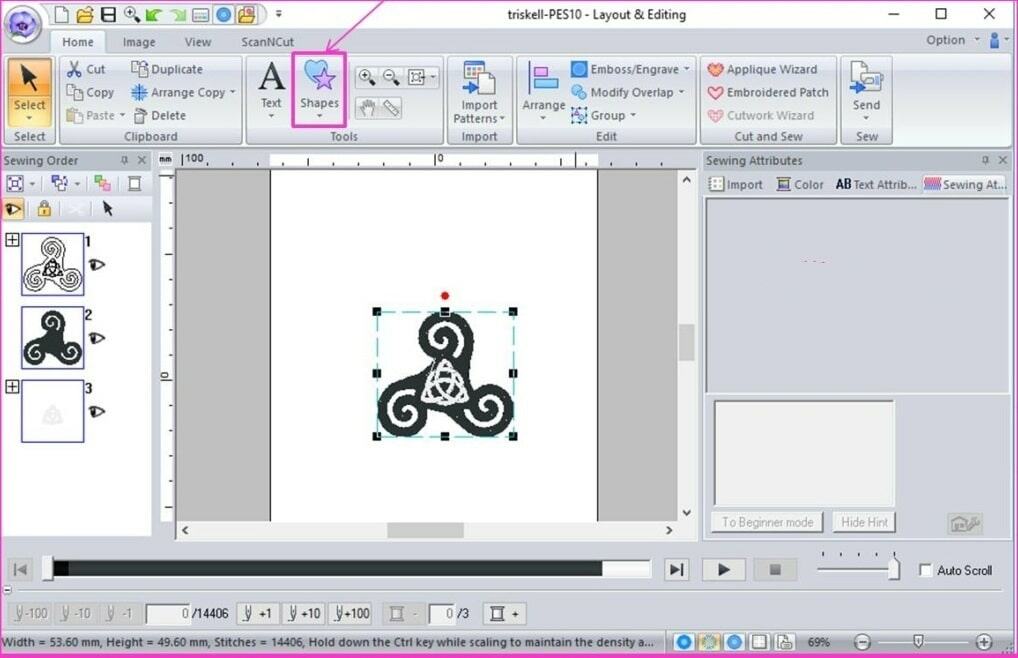
Open the desired pattern in PE Design
Open your file in PE Design and resize it to the desired size for the crest. (Be careful not to exceed 20% size change
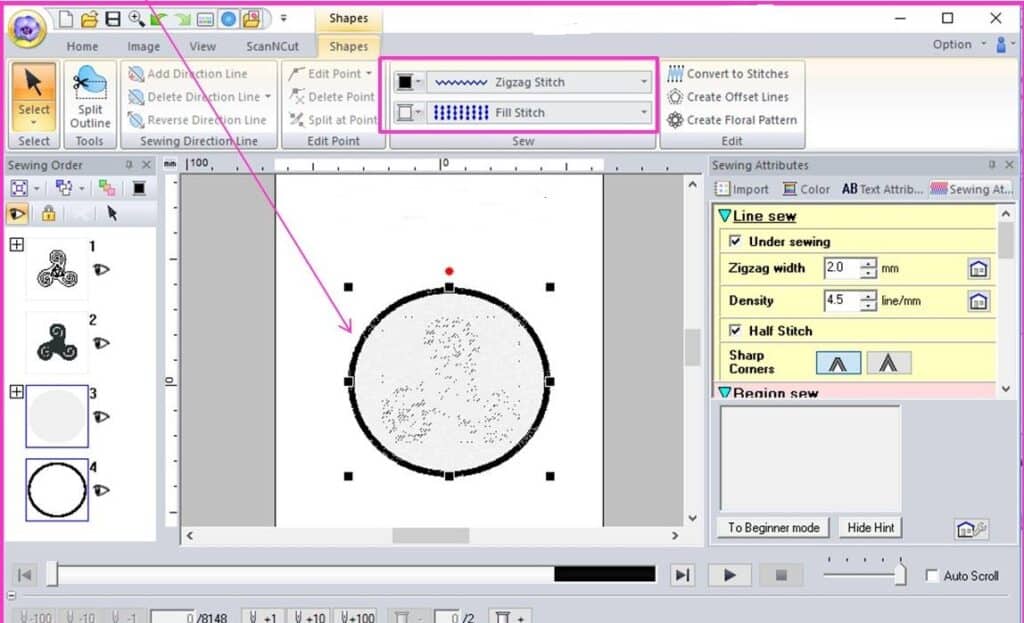
.Create the crest shape
Select the shape that will serve as the background for the crest and cover the pattern
So your pattern is now covered
Do not apply an outline but only a fill stitch (I put an outline so that my example is clearly visible)
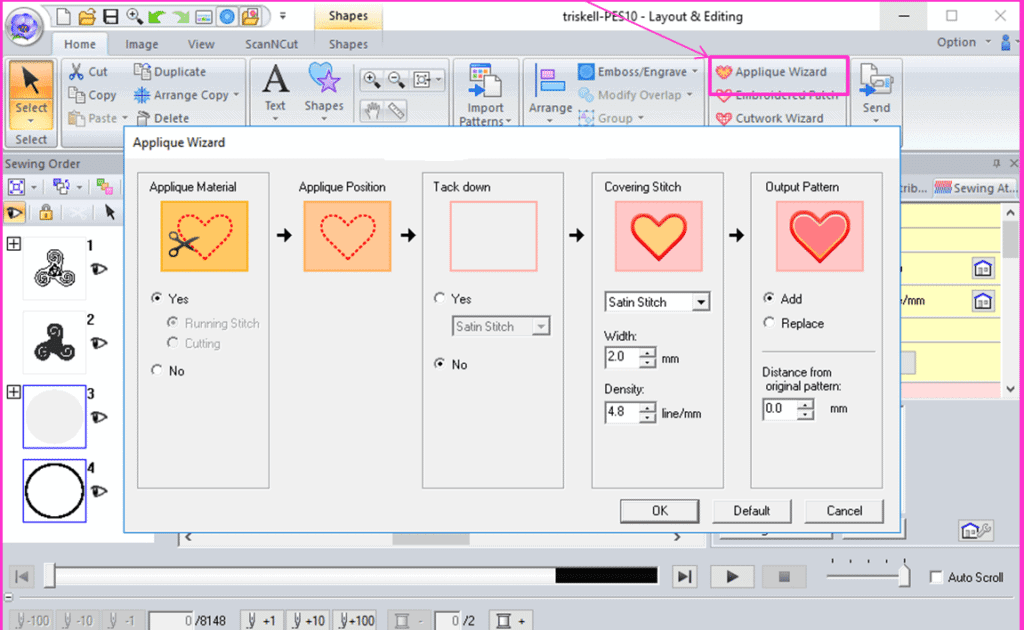
Open the Appliqué Wizard
Then click on “Applies wizard” button in the “Home” menu
Change the settings as needed and click “OK”
The pattern is now surrounded, your appliqué is created. You now have your crest background, and its outlines in the form of three layers (3 circles)
4 – Choice and configuration of the crest background
At this point you have 2 options:
Keep the embroidered filling background: in this case, you will have to delete the “overlaps” area of your pattern on your background)
OR Apply a background fabric: in this case you will have to delete the background fill layer and keep only the contour circles and apply your background fabric from the first embroidery step, then cut it out from this embroidery step .
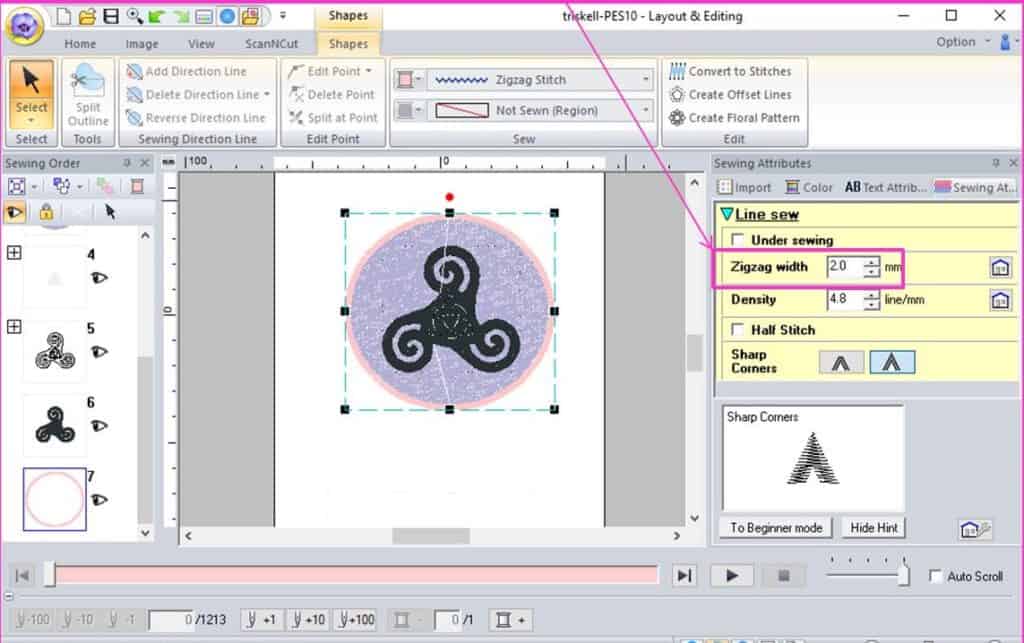
Optimize sewing order
Now change the sewing order to start with a simple first outline hoop. This circle will immediately delimit your crest pattern. This way you will avoid shifts! However, keep the final satin stitch of the circle as the last step of your embroidery!
Select the inserted shape and/or the circles generated by the “appliqué wizard” in the column on the left then > right click > “Sew first” in order to position them first in the embroidery order of your pattern. You can also move them by simply dragging and dropping them.
Personally, I prefer that my machine stops at each step so I leave the different default colors of my appliqué circles. My machine will stop like this every time, which will allow me to maintain control more easily in the event of a skid!
Finally, enlarge the final satin stitch to avoid stretch compensation issues or change it to a different stitch of your choice.
Related Posts
Discover relevant articles, tutorials, and tips to improve your skills and explore new techniques.
Stay inspired and connected to our embroidery community.



I am regular visitor, how are you everybody? This post posted at this web page is really
good.
It’s awesome in support of me to have a web site, which is good designed for my experience.
thanks admin
Greetings! Very helpful advice in this particular article!
It is the little changes that make the largest changes. Many thanks for sharing!
I was recommended this blog by my cousin. I am not sure whether this post
is written by him as nobody else know such detailed about my
trouble. You’re incredible! Thanks!