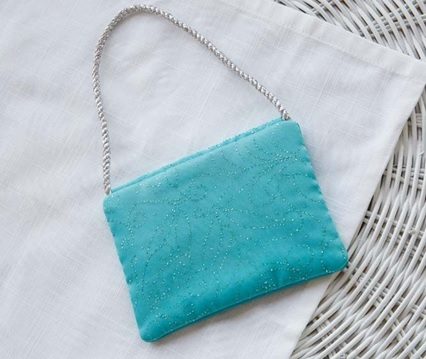
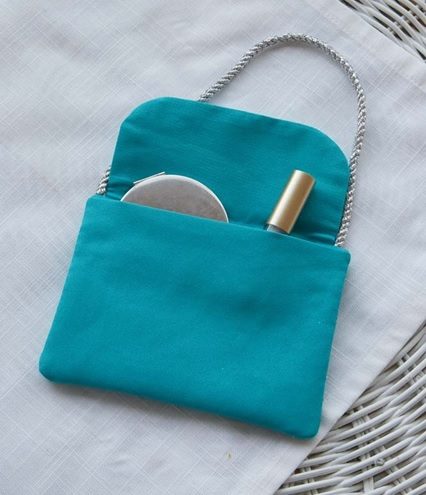
HIS FAST AND EASY purse is perfect for special occasions.
Experiment with different specialty fabrics to create your own unique bag. Crepe and sparkly tulle were used for the sample, and the results are stunning. To use both fabrics, simply layer the pieces together as one in each step where tulle is used — in this case, the flap and bag back.
MATERIALS
+ ¼ yard opaque special occasion fabric (such as crepe, satin or brocade)
+ ¼ yard sheer embellished fabric (such as tulle or
chiffon) (optional)
+ ¼ yard mediumweight fusible woven interfacing
+ 16” of coordinating cord or ribbon
+ Cut-away mesh stabilizer
+ 5×7 or larger hoop
+ Embroidery tape
+ Non-fusible permanent seam tape
PREPARE
- Download the ITH Mini Purse design at cmemag.com/freebies. Transfer the design to the machine.
- From the main fabric, cut two 5”x8” rectangles, two 6”x8” rectangles and one 8”x12” rectangle.
- If using the optional sheer fabric, cut one 5”x8” rectangle and one 6”x8”
- From the interfacing, cut two 5”x8” rectangles and three 6”x8” rectangles.
- Following the manufacturer’s instructions, fuse the corresponding interfacing pieces to the wrong sides of the 5”x8” and 6”x8” main
fabric rectangles.
- Press the 8”x12” rectangle in half widthwise with wrong sides
together. Open the fold and slide the last 6”x8” interfacing piece against the fold. Fuse.
EMBROIDER
Note: This project is embroidered in two hoopings. The first creates the flap, and the second creates the rest of the purse.
- Load the flap design onto the embroidery machine.
- Hoop a piece of stabilizer and place the hoop onto the machine.
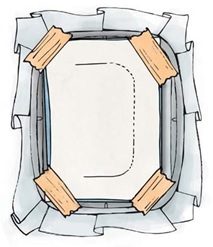
- Stitch step one to create a placement line on the stabilizer.
- Center one 5”x8” rectangle right side up over the placement line, covering all the stitches. If using optional sheer fabric, layer the 5”x8” sheer rectangle right side up over the main fabric, treating the two as one piece. Tape in place. Center the other 5”x8” rectangle right side down on top. Tape in place.
- Embroider step two to stitch
the flap
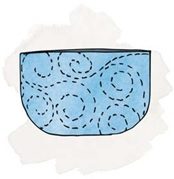
- Remove the project from the hoop. Trim around the stitching, leaving a
½” seam allowance. Clip the curves, turn and press. Set the flap aside
- Load the purse design onto the
- Hoop a piece of stabilizer and place the hoop onto the machine.
- Stitch step one to create a place- ment line.
- Center one 6”x8” rectangle right side up over the placement line. If using
optional sheer fabric, layer the 6”x8”
sheer rectangle right side up over
the main fabric, treating the two as one piece. Tape in place.
- Stitch step two to tack down the
- Stitch step three to create two small placement lines.
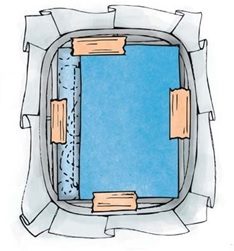
Center the folded 8”x12” rectangle over the project, aligning the fold with the placement lines. Tape in place
- Embroider step four to stitch down the fabric.
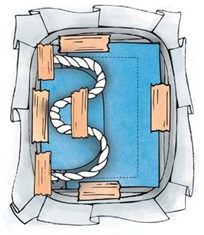
- Place the completed flap right side down over the project with the open end overlapping the left stitching line by 1” and the curve toward the center of the hoop
- Place one cord end against the flap left edge with the length extending over the project Tape the end in place outside the stitch line. Repeat with the other cord end, placing it to
the flap right side. Tape in place outside the stitch line. Fold the length of the cord to the project center and tape in place
- Embroider step five to stitch down the flap and cord.
- Center the remaining 6”x8” rectangle over the project, right side down. Tape in place.
- Stitch step six to complete the
- Remove the project from the hoop. Trim around the project, leaving a ½” seam allowance. Clip the corners.
- Turn the project right side out through the opening. Turn in the
open seam and use permanent seam
tape to close the opening.
Turn the pocket to the back of the project; press to complete.
Related Posts
Discover relevant articles, tutorials, and tips to improve your skills and explore new techniques.
Stay inspired and connected to our embroidery community.




It’s fantastic that you are getting ideas from this article as well as from our
argument made at this place.
I quite like reading through an article that will
make men and women think. Also, many thanks for permitting me to
comment!
Hey There. I found your blog using msn. This is a really well written article.
I’ll be sure to bookmark it and come back to read more of
your useful info. Thanks for the post. I’ll certainly comeback.