best tips for making an applique
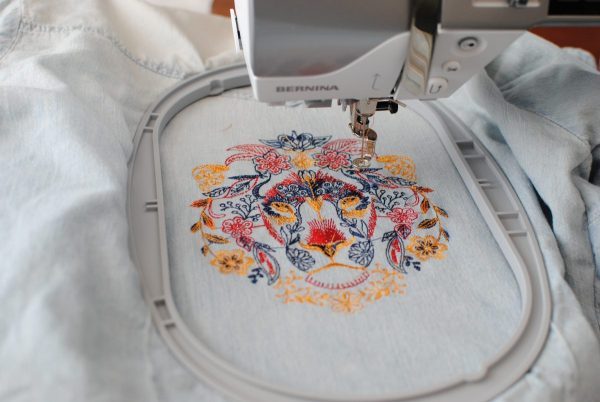
Applique embroidery is a popular and decorative way to add a personal touch to clothing, home decor items, and other textiles. It involves sewing small fabric pieces onto a larger base fabric using an embroidery machine. If you’re new to applique embroidery or just looking to improve your skills, here are some tips to help you get started:
-
Choose the right stabilizer: Stabilizers provide a base for the fabric and help keep it in place while you’re embroidering. For applique, a cutaway or tearaway stabilizer is recommended. Cutaway stabilizers are thicker and provide more support, but they may be more difficult to remove. Tearaway stabilizers are thinner and easier to remove, but they may not provide as much support.
-
Use a light-colored base fabric: It’s easier to see the details of your applique design on a light-colored base fabric. Darker fabrics may make it harder to see your stitches and can also cause the embroidery to look muddy.
-
Cut your applique pieces accurately: Accurate cutting is essential for a clean and professional-looking finish. Use a sharp pair of scissors or a rotary cutter to carefully cut out your applique pieces. If you’re using a template, make sure it’s placed correctly on the fabric before cutting.
-
Place your applique pieces correctly: Position your applique pieces on the base fabric before sewing to ensure they are placed correctly. Use a temporary adhesive or fabric glue to hold them in place. You can also use water-soluble stabilizer or a topping to keep the fabric pieces from shifting.
-
Use a satin stitch for a seamless finish: A satin stitch is a series of closely spaced straight stitches that can be used to join applique pieces or cover raw edges. It provides a smooth and seamless finish and is a good choice for curved or irregular shapes.
-
Experiment with different fabrics: Applique embroidery is a great way to add texture and interest to your projects. Experiment with different fabrics, such as cottons, silks, velvets, and even lace. Just make sure to choose fabrics that are compatible with your embroidery machine and can withstand the embroidery process.
-
Use a stabilizer for stretchy fabrics: If you’re working with stretchy fabrics like knits or spandex, a stabilizer is a must. It will help keep the fabric taut and prevent it from distorting during the embroidery process.
-
Test your embroidery before starting: It’s always a good idea to test your embroidery on a scrap piece of fabric before starting on your final project. This will give you a chance to adjust your settings and make any necessary changes before you begin.
-
Take your time: Applique embroidery can be time-consuming, but it’s worth taking the time to do it right. Rushing through the process can lead to mistakes and an overall less professional finish.
-
Practice makes perfect: Like with any new skill, the more you practice, the better you’ll become. Don’t get discouraged if your first few attempts aren’t perfect. Keep practicing and experimenting with different techniques and fabrics, and you’ll soon be a pro at applique embroidery.
I hope these tips are helpful as you embark on your applique embroidery journey. Happy embroidering!


Thank you so much for sharing such an amazing guideline.