Creating a Logo with Ideogram and Embroidery Digitizing
The world of embroidery takes a design and transforms it into a captivating tapestry of color and texture. But before the needle meets the fabric, there’s a crucial digital bridge to cross: logo creation and digitizing. This guide dives into the exciting world of using Ideogram, a powerful AI tool, to create a unique logo and then translating it into an embroidery-ready format.
Why Ideogram?
Ideogram stands out as a revolutionary AI tool for logo design. It excels at:
- Understanding Text: Unlike other AI art generators, Ideogram excels at handling text clearly and accurately. This is crucial for incorporating your brand name seamlessly into your logo design.
- Embracing Creativity: With a vast range of styles and artistic influences, Ideogram allows you to explore a multitude of design directions for your logo.
- Customization Power: You aren’t limited to pre-made templates. Ideogram lets you refine your logo with specific keywords and descriptions, ensuring it aligns perfectly with your brand vision.
Crafting Your Logo with Ideogram
1. Define Your Brand Identity:
Before diving into Ideogram, take a step back and consider your brand. What message do you want your logo to convey? Keywords that describe your brand personality (e.g., playful, sophisticated, minimalist) will be helpful later.
2. Explore Ideogram’s Interface:
Head to https://ideogram.ai/ and create a free account. Familiarize yourself with the interface. The “prompt box” is where you’ll describe your desired logo.
3. Craft Your Prompt:
Here’s where the magic begins! Here’s a breakdown of how to craft your Ideogram prompt:
- Start with “Create a logo for…” Followed by your brand name.
- Describe the visual style: Use keywords like “minimalist,” “watercolor,” “geometric,” or any style that resonates with your brand.
- Incorporate your brand keywords: Subtly weave in keywords that capture your brand personality (e.g., “playful font,” “sophisticated colors”).
- Specify design elements (optional): If you have a specific image in mind, include it here (e.g., “include a coffee mug”).
4. Experiment and Refine:
Ideogram generates several logo variations based on your prompt. Review the options! If you like the overall direction, use the “refine” button to make small adjustments. For example, you could request a different color palette or a bolder font.
5. Choose Your Perfect Logo:
Once you’ve found the ideal logo, download it in a high-resolution format (e.g., PNG). This high-resolution image will be crucial for the digitizing process later.
Embroidery Digitizing: Transforming Your Logo
Now that you have your stunning logo, it’s time to translate it into a language embroidery machines understand. Here’s what you’ll need:
- Embroidery Digitizing Software: Popular options include Wilcom, Hatch, and PES. These programs allow you to convert your logo into a series of stitches.
- Basic Understanding of Digitizing: Familiarity with stitch types, thread properties, and hoop limitations is essential. Consider online tutorials or beginner-friendly software to get started.
The Digitizing Process:
1. Import Your Logo: Import your high-resolution logo file (PNG) into your digitizing software.
2. Trace and Separate Elements: Use the software’s tracing tools to convert your logo’s outlines into digital embroidery paths. If your logo has multiple colors, separate them into individual layers for easier digitizing.
3. Choose Stitch Types and Densities: Select appropriate stitch types and densities for different elements of your logo. For example, lettering might require a denser satin stitch, while larger areas might use a fill stitch.
4. Underlay and Overlays: Depending on the complexity of your logo, you may need to add underlay stitches for stability and overlays for additional detail.
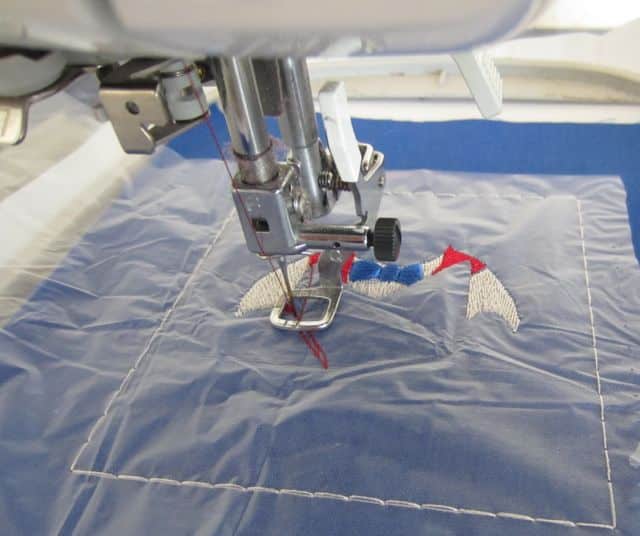
5. Test and Refine: Once your digitizing is complete, run a test stitch-out on a scrap fabric to ensure the stitches are placed correctly and the overall design looks good. Refine your digitizing based on the test results.
Beyond the Basics: Advanced Techniques
For those who want to push the boundaries, here are some advanced digitizing techniques to explore:
- 3D Puff Embroidery: Create a dimensional effect by using specialized software and techniques for raised embroidery.
- Applique Embroidery: Combine fabric appliques with traditional stitches for a layered and textured look.
- Metallic Threads: Incorporate metallic threads into your digitizing to add a touch of shine and sophistication.
The Final Stitch: Showcasing Your Embroidered Logo
With your digitized logo ready, it’s time to see it come to life! Here are some ideas for showcasing your embroidered logo:
- Embroider It Yourself: If you have an embroidery machine, get stitching and create your own embroidered masterpiece.
- Partner with an Embroidery Shop: Local embroidery shops can take your digitized logo and embroider it on a variety of items, from garments and hats to tote bags and homeware.
- Sell Your Designs: If you’ve created a logo that has broader appeal, consider selling your digitized logo files online. Many platforms allow you to connect with crafters and businesses looking for unique embroidery designs.
Conclusion: The Power of Combining Creativity and Technology
Creating a logo with Ideogram and then translating it into an embroidered masterpiece is a testament to the power of combining creativity and technology. Ideogram allows you to explore a vast design landscape, while digitizing software bridges the gap between design and production. So, embrace the possibilities, unleash your creative vision, and embark on your journey from sketch to stunning embroidered logo!
Related Posts
Discover relevant articles, tutorials, and tips to improve your skills and explore new techniques.
Stay inspired and connected to our embroidery community.


