Mastering the Art of Centering Embroidery Designs: Expert Tips and Q&A
Introduction: Embroidery is a beautiful craft that transforms plain fabric into stunning works of art. However, even the most intricate design can lose its impact if it’s not properly centered. Whether you’re a beginner or an experienced embroiderer, achieving perfect placement can sometimes feel like a challenge. In this comprehensive guide, we’ll explore the best techniques for centering embroidery designs, answer common questions, and provide expert tips to help you achieve professional-looking results every time.
The Importance of Centering Embroidery Designs: Before we dive into the how-to, let’s briefly discuss why centering is crucial:
- Aesthetics: A well-centered design is visually pleasing and looks professional.
- Balance: Proper centering ensures the embroidery complements the item it’s on.
- Functionality: For items like pockets or sleeves, correct placement is essential for usability.
- Professionalism: Accurately centered designs reflect attention to detail and craftsmanship.
Now, let’s explore various methods and answer some common questions about centering embroidery designs.
Q&A: Centering Embroidery Designs
Q1: What are the basic tools needed for centering embroidery designs? A1: Essential tools include:
- Ruler or measuring tape
- Fabric marking pen or chalk
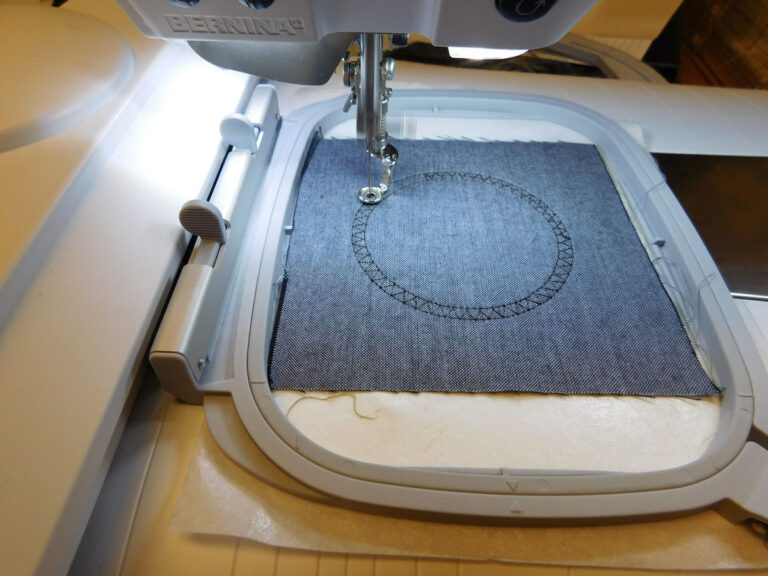
- Embroidery hoop
- Target stickers or sticky notes
- Embroidery placement ruler or grid
- Pins
Q2: How do I find the center of my embroidery hoop? A2: To find the center of your hoop:
- Measure the diameter of the inner hoop.
- Divide this measurement by 2 to get the radius.
- Mark the center point on both the vertical and horizontal axes.
- The intersection of these marks is your center point.
Q3: What’s the easiest method for centering a design on a t-shirt? A3: For t-shirts, try the folding method:
- Fold the shirt in half vertically, then press to create a center crease.
- Measure down from the collar to your desired placement and mark.
- Use the intersection of this mark and the center crease as your design center.
- Place target stickers or draw crosshairs at this point.
Q4: How can I ensure my design is straight when hooping? A4: To keep your design straight:
- Use the grid on your machine’s embroidery arm as a guide.
- Align the fabric’s weave with the hoop’s edges.
- Use a ruler to check that your marked center lines are parallel to the hoop’s edges.
- Consider using a hooping station for consistent results.
Q5: What’s the best way to center a design on a curved surface like a cap? A5: For caps:
- Use a cap frame and hoop according to your machine’s instructions.
- Mark the center of the cap’s front panel.
- Use adhesive target stickers to mark your design’s center point.
- Align the cap’s center mark with your design’s center point.
- Use your machine’s built-in camera or laser guide, if available, for precise alignment.
Q6: How do I center multiple designs in one hoop? A6: To center multiple designs:
- Create a paper template of your hoop size.
- Draw your designs on the template, ensuring proper spacing and alignment.
- Mark the center of each design on the template.
- Transfer these marks to your fabric using the paper template as a guide.
- Use these marks to align your designs when embroidering.
Q7: What’s the float method, and how can it help with centering? A7: The float method involves:
- Hooping only your stabilizer, not your fabric.
- Marking your fabric’s center point and aligning it with the hoop’s center.
- Securing the fabric to the hooped stabilizer with pins or temporary adhesive spray.
- This method allows for easier adjustments and is great for delicate or hard-to-hoop items.
Q8: How can I use my embroidery machine’s features to help with centering? A8: Many modern machines offer centering aids:
- Built-in cameras or laser guides for precise placement.
- On-screen grid displays for alignment.
- Basting functions to outline the design area before embroidering.
- Design positioning features that allow you to move the design on-screen.
Q9: What’s the best way to center a design on a pocket? A9: For pocket embroidery:
- Remove the pocket from the garment if possible.
- Find the pocket’s center by folding it in half both vertically and horizontally.
- Mark the center point.
- Hoop the pocket with stabilizer, aligning the center mark with the hoop’s center.
- If the pocket can’t be removed, use the float method and carefully align the pocket in the hoop.
Q10: How do I ensure proper placement for left-chest logos? A10: For left-chest logos:
- Generally, place the design 7-9 inches down from the shoulder seam and 4-6 inches from the center of the shirt.
- Use a placement guide or create a template for consistency across multiple shirts.
- Always do a test stitch-out on a similar garment to verify placement.
Expert Tips for Perfect Centering:
- Practice Makes Perfect: Don’t be discouraged if your first attempts aren’t perfectly centered. Like any skill, centering improves with practice.
- Create Templates: For frequently used sizes and placements, create reusable templates from clear plastic sheets. Mark center points and common design sizes for quick reference.
- Use Printed Templates: Print your design on paper at actual size. Cut out the design and use it to visualize placement on your item before hooping.
- Invest in Placement Tools: Specialized tools like embroidery rulers with grids and target stickers can significantly improve your accuracy.
- Master the Art of Hooping: Proper hooping is crucial for centering. Ensure your fabric is taut but not stretched, and always double-check alignment before starting.
- Utilize Basting Stitches: Many machines offer a basting option that outlines your design area. Use this to verify placement before committing to the full design.
- Know Your Machine: Familiarize yourself with your machine’s centering features. Some have on-screen grids or positioning systems that can be incredibly helpful.
- Consider the Garment Structure: Remember that elements like seams, buttons, or zippers can affect how a centered design looks when worn. Adjust accordingly.
- Use Appropriate Stabilizers: Proper stabilization prevents shifting during embroidery, helping maintain your carefully centered design.
- Take Photos: For complex placements, take a photo of your hooped item before embroidering. This can help you replicate successful placements in the future.
Troubleshooting Common Centering Issues:
Even with careful planning, centering issues can occur. Here are some common problems and solutions:
- Double-check your hooping process and ensure the fabric hasn’t shifted.
- Verify that your machine’s hoop is properly attached and calibrated.
- Designs on Multiple Items are Inconsistent:
- Create a placement template for batch projects.
- Use the same hooping method and reference points for each item.
- Design Looks Centered in the Hoop but Not on the Garment:
- Always consider the entire garment, not just the hooped area.
- Use garment folding techniques to find true centers, especially for asymmetrical items.
- Difficulty Centering on Textured or Stretchy Fabrics:
- Use additional stabilization methods like temporary adhesive sprays.
- Consider the float method for more control over fabric placement.
Conclusion: Centering embroidery designs is a crucial skill that combines precision, patience, and practice. By utilizing the right tools, understanding your machine’s capabilities, and following the tips and techniques outlined in this guide, you’ll be well on your way to achieving perfectly centered designs every time. Remember, even experienced embroiderers sometimes face centering challenges, so don’t be discouraged if it takes a few attempts to get it right. With persistence and attention to detail, you’ll soon be creating beautifully centered embroidery projects that look professional and polished. Happy stitching!
Related Posts
Discover relevant articles, tutorials, and tips to improve your skills and explore new techniques.
Stay inspired and connected to our embroidery community.

