Getting your embroidery in exactly the right place can be tricky, but there are many
tools and methods available to make sure each design lands exactly where you want
it to. Read on for 15 ways to perfectly position designs on fabric and in the hoop
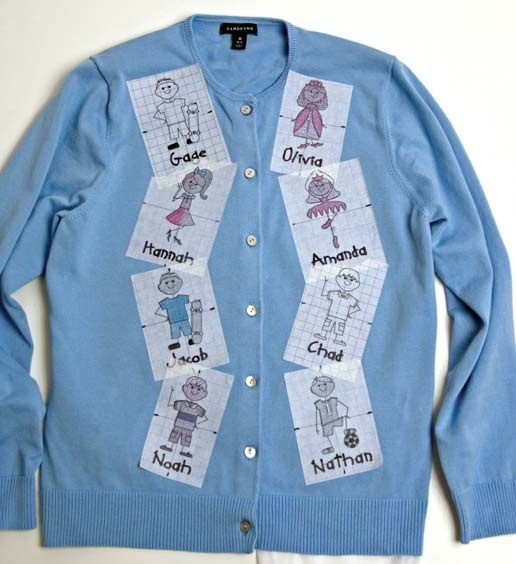
1 Use a paper template to find the perfect placement for your design. Templates are true-to-size printouts or copies of the design you’re going to use.
They’re often included in design packs, but they’re easy to make yourself as well. Open the design in an embroidery editing, sizing or digitizing program. Adjust the software settings to include the vertical and horizontal centerlines, make sure it’s sized at 100%; print onto paper.
2 Use a vellum template. They work the same as paper templates but are more transparent.
You can print or photocopy a vellum template just as you would a paper template.
3 Use a transparency template. Use an ink-jet or
laser printer to print a transparency template. Packs of transparencies are often expensive, but single sheets are affordable and found at office supply stores or copy shops.
4 Use a pressure-sensitive template. This lightweight, transparent paper is adhesive-backed to aid with placement. Templates made with it are reusable and eliminate the need for pinning >>>.
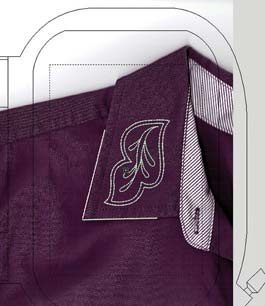
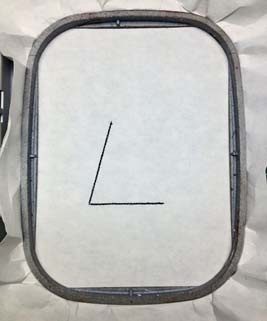
5 Use a placement line to simplify stitching on tight areas, such as collar points, cuffs and pockets. Scan the desired embroidery area. Using digitizing software, add the edges of
that area to the design as the first step, paying attention to the desired placement
(B). Hoop a piece of stabilizer and place the hoop in the machine. Stitch
the first step to create a placement line (C). Spray the stabilizer with temporary spray adhesive and position the project along the placement line. Finger-press
to secure. Return the hoop to the machine and embroider the design.
Begin with a paper template (or more than one for multiple embroideries).
Mark the design upper edge using an arrow on the vertical centerline.
Cut out the design, leaving a ¼” border . Using a rotary cutter, cut a small slit at the horizontal and vertical centerlines intersection and fold back two corners, creating two small
triangle-shaped openings .
Use the templates to audition the design on the project . Once you’re satisfied, mark the design center through the triangles using chalk or a removable fabric marker. Also mark
an arrow denoting the design upper edge. Remove the template .
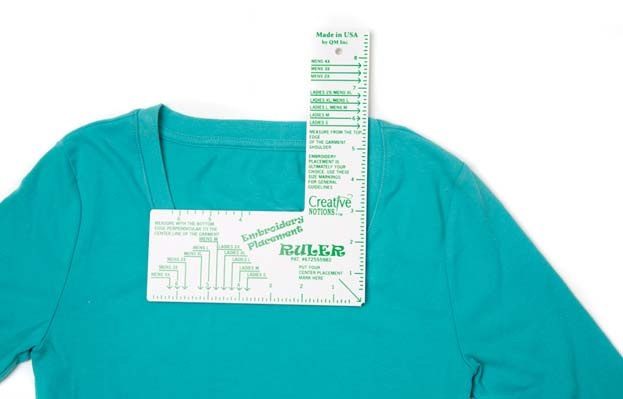
6 Use an Embroidery Placement Ruler to achieve perfect placement on shirts. The ruler features pre-marked industry standard embroidery placement markers that fit
an adult small to 4XL. Simply follow the directions printed on the ruler to align the marks for the correct size with the center front and shoulder seams, and then mark the centerlines
using the corner of the ruler >>>.
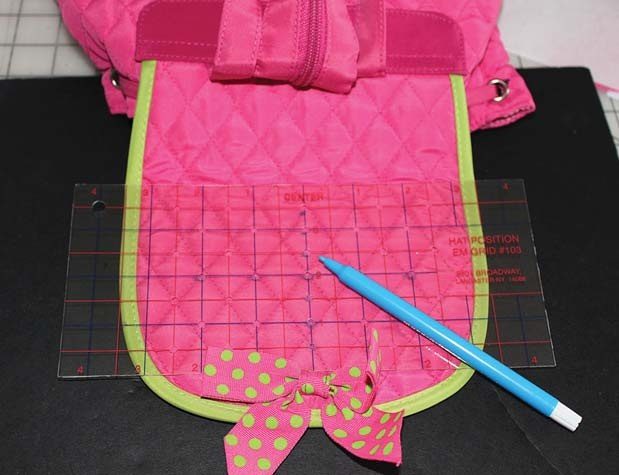
7 Use an Easy Mark Grid centering template to center and evenly space embroidery designs.
Align the grid over the fabric with its center positioned over the desired design center. Use a removable fabric marker to mark the dots through the template holes, and then remove the grid and connect the dots to form a solid line. Align the needle over the cross marks
and embroider the design <<<<.
8 Before beginning embroidery, always sink the unthreaded needle to make sure it is perfectly
aligned with the center of the cross marks. If it isn’t, adjust the hoop position and try again until the needle pierces the correct spot. Raise the needle, thread it, and embroider the design.
9 Use adhesive rulers to mark wherever it would be useful to have a ruler or straightedge but
difficult to place one. The backing peels off to reveal a low-tack adhesive
so that the ruler will stay in place but be easily removed. They’re great for triangulating and extending lines without marking on the fabric.
10 Use a protractor to correct for crooked hooping. Mark a line between center marks on
the hoop (adhesive rulers are great for this!). Extend the closest cross mark and use the protractor to measure the angle between. On the machine, rotate the design by that many degrees in the correct direction.
11 Make a fabric template and convert it to paper. If possible, use a piece of the actual fabric
you will be embroidering so the process doubles as a pattern test. Hoop
the fabric with the proper stabilizer, load the design into the machine and embroider. Press the design from the wrong side and then photocopy it .
12 Make a fabric template and trace it onto the plastic hoop template that comes with
the machine. Use a dry- or weterase marker so it’s easily removed when the embroidery is complete. Use the holes in the template to mark the design centerlines .
13 Use targeting stickers. In their most basic form, these are just preprinted cross marks that
allow you to avoid marking directly on the fabric, but some machines include “snowman” stickers, so called because of their two adjacent circles . The machines that use these stickers are able to sense their location and align the needle to them automatically. To use, place the sticker with the center of the large circle in the center or at the edge of the desired design
placement. On the machine, indicate where the sticker is in relation to the design. Use the machine’s sensor to align the needle, and then remove the sticker and embroider the design.
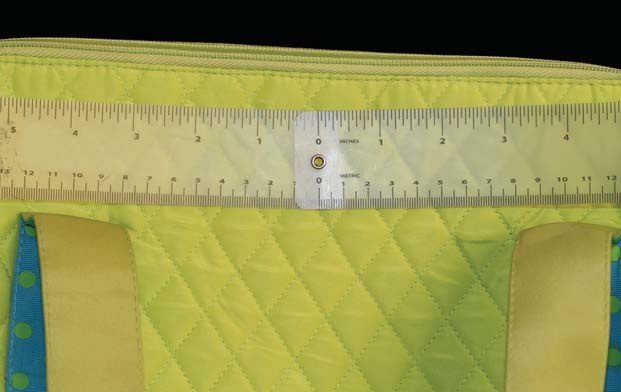
14 Use centering rulers. These transparent rulers often come in sets of three, and
each has a grommet in one end. Position two of the rulers as necessary, aligning the grommets to find the center of an area. Mark the center through the grommets using
a removable fabric marker >>>.
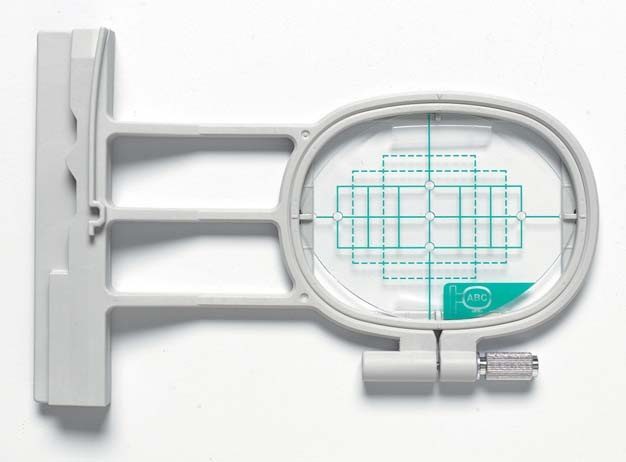
15 Use the plastic template that comes with the machine to assist with hooping . Place the template inside the hoop inner ring. Place the outer hoop under the fabric
and stabilizer to be hooped. Settle the inner ring over the fabric, matching
the centerlines and adjusting as necessary. Carefully push the hoop
into the outer ring. Check the placement; if it’s okay, tighten the screw.
If not, unhoop and try again
Related Posts
Discover relevant articles, tutorials, and tips to improve your skills and explore new techniques.
Stay inspired and connected to our embroidery community.



I’m not sure why but this blog is loading incredibly slow for me.
Is anyone else having this issue or is it a problem on my
end? I’ll check back later and see if the problem still exists.
Amazing things here. I’m very satisfied to peer your post.
Thanks a lot and I’m having a look forward to contact you. Will you please
drop me a mail?
I want to to thank you for this fantastic read!! I absolutely loved every bit of it.
I have got you book-marked to look at new things you post…
You need to be a part of a contest for one of the best
blogs on the internet. I’m going to highly recommend
this site!