First steps with an embroidery machine
Embroidery machines are a great tool for anyone interested in sewing and crafting. With an embroidery machine, you can add intricate designs and patterns to a variety of fabrics, from clothing to home decor. If you’re new to embroidery, it can be intimidating to get started. Here are some first steps to help you get started with your embroidery machine.
-
Read the manual: This may seem obvious, but it’s important to familiarize yourself with your machine’s features and functions before you get started. Each embroidery machine is different, so make sure you understand how yours works.
-
Set up your machine: Once you’ve read the manual, it’s time to set up your machine. This will typically involve installing the embroidery arm, attaching the embroidery hoop, and threading the machine. Make sure to follow the instructions carefully to ensure proper setup.
-
Choose your embroidery design: There are many options for embroidery designs, including pre-made patterns and designs that you can create yourself. Consider what you want to embroider and choose a design that is appropriate for your project.
-
Transfer your design to the machine: Most embroidery machines come with software that allows you to transfer your design to the machine. Follow the instructions for your specific machine to do this.
-
Hoop your fabric: To embroider, you’ll need to hoop your fabric. This involves placing your fabric in an embroidery hoop and attaching it to the machine. Make sure the fabric is taut but not stretched, as this will affect the quality of your embroidery.
-
Select your thread and needle: Choose thread that is appropriate for your fabric and design. You’ll also need to select the correct needle for your machine and fabric. Refer to your machine’s manual for guidance on which needle to use.
-
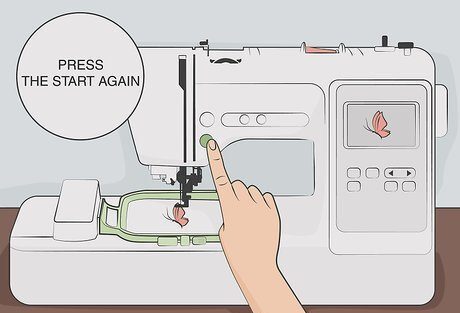
Start embroidering: Once you’ve set up your machine and prepared your fabric, you’re ready to start embroidering. Follow the instructions for your specific machine to begin the embroidery process.
-
Finish and care for your embroidery: When you’re finished embroidering, remove the hoop from the machine and carefully cut the excess threads. Wash and iron your embroidered fabric according to the fabric’s care instructions.
Embroidery can be a fun and rewarding hobby, and with a little practice, you’ll be creating beautiful embroidered projects in no time. Don’t be afraid to experiment and try new techniques as you get more comfortable with your embroidery machine.
Related Posts
Discover relevant articles, tutorials, and tips to improve your skills and explore new techniques.
Stay inspired and connected to our embroidery community.


