Embellish Your Projects with Embroidered Patches: A Step-by-Step Guide
Embroidery machines have become increasingly popular tools for crafting enthusiasts, offering a versatile and creative way to personalize clothing, bags, and other accessories. Among the many projects you can create with an embroidery machine, making custom patches stands out as a fun and rewarding endeavor. With the right supplies and techniques, you can transform your embroidery machine into a personal patch-making machine, adding unique embellishments to your wardrobe and belongings.
Essential Supplies for Patch Creation
Before embarking on your patch-making journey, ensure you have the necessary tools and materials:
-
Embroidery Machine: This is the heart of your project, providing the stitching capabilities to create intricate designs on your patch.
-
Stabilizer: Embroidery stabilizer helps your patch maintain its shape and prevents puckering or distortion during the embroidery process. Choose between tear-away stabilizer for a temporary backing and permanent stabilizer for a more secure attachment.
-
Patch Fabric: Select a fabric suitable for embroidery, such as felt, polyester, or cotton. Felt is a popular choice for patches due to its thickness and stability.
-
Embroidery Design: You can either create your own embroidery design using embroidery software or find free or purchased designs online.
-
Embroidery Thread: Choose embroidery thread that matches your project or adds a pop of color.
-
Adhesive or Heat Transfer Method: Once embroidered, you will need to secure the patch to the desired fabric. Adhesives like Fray Check or Heat Transfer methods are common options.
Creating Your Embroidered Patch
Now that you have your supplies ready, follow these steps to create your custom patch:
-
Prepare the Patch Fabric: Cut your patch fabric to the desired size, ensuring it is slightly larger than your embroidery design. Center the fabric on a piece of stabilizer, ensuring the stabilizer is slightly larger than the patch.
-
Load the Embroidery Design: Transfer your embroidery design onto the embroidery machine’s embroidery hoop or designated memory card.
-
Attach the Stabilized Patch: Secure the stabilizer and patch to the embroidery hoop or machine’s designated stabilizer plate. Use basting spray or weights to ensure the fabric remains in place during the embroidery process.
-
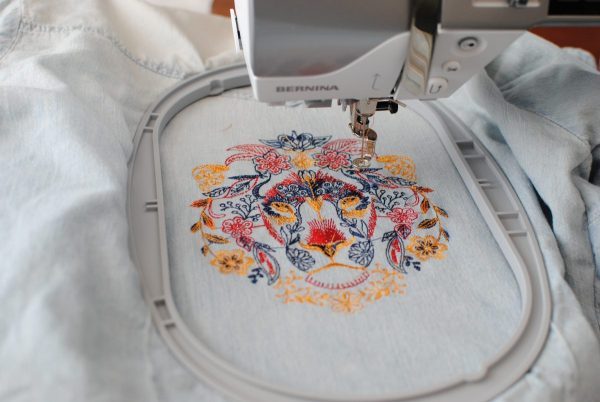
Embroider the Patch: Select the appropriate embroidery settings, including stitch type, thread color, and speed. Once the embroidery machine is ready, initiate the embroidery process.
-
Remove the Embroidery Hoop: Carefully remove the embroidery hoop from the machine, allowing the stabilizer to cool slightly.
-
Trim Excess Fabric: Trim away any excess fabric and stabilizer, leaving a clean edge around the embroidered patch.
-
Secure the Patch: Depending on your preferences, use adhesives like Fray Check or heat transfer methods to secure the patch to the desired fabric.
Tips for Perfect Patches
To achieve flawless embroidered patches, consider these additional tips:
-
Practice on Scrap Fabric: Before working on your final patch, practice your embroidery design on scrap fabric to refine your technique and ensure proper stitch placement.
-
Use High-Quality Supplies: Invest in high-quality embroidery thread, stabilizer, and adhesives to ensure durability and vibrant colors.
-
Maintain Proper Machine Maintenance: Regularly clean and maintain your embroidery machine to ensure optimal performance and longevity.
-
Embrace Creativity: Let your imagination run wild when creating embroidery designs. Experiment with different textures, colors, and patterns to express your unique style.
With these simple steps and tips, you can easily transform your embroidery machine into a personal patch-making machine, adding a touch of personalization and creativity to your projects. So, grab your embroidery machine, gather your supplies, and start creating unique and eye-catching patches that reflect your passion and style.
Related Posts
Discover relevant articles, tutorials, and tips to improve your skills and explore new techniques.
Stay inspired and connected to our embroidery community.


Hello i am kavin, its my first occasion to commenting anyplace, when i read this piece of
writing i thought i could also make comment due to this brilliant article.
Heya i’m for the first time here. I found this board and I find It
really useful & it helped me out a lot. I hope to give something back and help others like you helped me.
Pretty great post. I just stumbled upon your blog and wanted to mention that I’ve really loved browsing your weblog posts.
After all I’ll be subscribing for your feed and I am
hoping you write again very soon!
Hello every one, here every one is sharing these kinds of experience,
thus it’s nice to read this website, and I used to pay a
quick visit this weblog everyday.
Great goods from you, man. I’ve understand your stuff previous
to and you are just too wonderful. I really
like what you have acquired here, really like what you’re saying and the way in which you say it.
You make it entertaining and you still take care of
to keep it sensible. I can’t wait to read much more from
you. This is actually a tremendous website.
Thanks for your marvelous posting! I genuinely enjoyed reading it, you happen to
be a great author. I will make sure to bookmark your blog and will often come back
sometime soon. I want to encourage you to definitely continue your great job,
have a nice afternoon!