1 Introduction
Digital embroidery must take into account a lot of physical constraints:
The type of fabric
the type of wire
The effect of the shape of the embroidery on the fabric
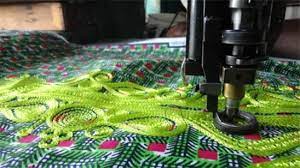
The three biggest problems with embroidery are puckering (fabric is warped), poor fabric coverage (you can see through an area of embroidery when it was not planned) and misalignment (objects that should touch do not touch each other). Good strapping and the use of an appropriate stabilizer, as seen above, reduces this risk. On the digital level, the quality of an embroidery also depends a lot on the design and the digitization. To avoid misalignment, it is necessary in particular to compensate for the pull/push effect (distortion effects during embroidery) and sometimes to overlap the edges of the objects in the design software as we will see in other tutorials. However, let’s first look at the physical factors that go into achieving beautiful embroidery:
What type of wire to choose?
How do the different types of fabric behave?
Which type of needle is appropriate for which type of fabric?
What are the types of filling and how to configure them? Are there differences between machines and software?
How to determine if the thread tension is correct?
This article will mainly give an overview of the choice of yarn, needles, but we will also briefly touch on other aspects.
2 embroidery threads
The most popular embroidery threads are made from viscose (also called “artificial silk”) or polyester. A 40 weight polyester or viscose yarn can be used on both fine fabrics like silk and rougher/heavier fabrics like jeans or leather. Polyester is easier to use and more durable than viscose, but a little less pretty. The threads can also be made from other materials such as wool, cotton (in several variants) as well as various mixtures of materials such as metallized polyester.
There are several thread thickness metrics and none are really intuitive to understand. In trade, a system of weights (Wt.) is generally used. Some standard weights:
75 = very fine, for example for monograms on silk ties,
60 = fine, e.g. for delicate fabrics and small letters,
50 = medium fine, for medium weight fabrics,
40 = for standard fabric, the most popular weight,
30 = slightly thick, for filling larger areas, quilts, cross stitches,
12 = thick, decorative stitches, “handmade” embroidery
A typical embroidery consumes approximately the following amount:
1000 stitches ~= 5.0 m for (top yarn, size 40)
1000 stitches ~= 3.5m (bobbin thread, size 60)
A crest (Engl. “patch”) at 10000 points, therefore partially filled, therefore consumes about 50m. With a 1000 meter spool, you can embroider 20 patches. A reel of 1000 costs between 2 and 3 euros, a reel of 5000 around 9 euros. That is, the cost of thread is quite negligible for small embroidery. Pricing Practices for Embroidery mentions the following to calculate a price:
$1.5 for 1000 points
$60/h to digitize
Then, you have to add either a minimum price (to make the very small embroideries profitable) or a minimum order threshold. You can also charge a fixed price for strapping and ordering. This can vary between $5 and $10.
The systems used to calculate prices can be much more complex. They take into account the number ordered, the size (the smaller the more the price/item and expensive), color change, number of colors, type of fabric, specialty fabric for badges or appliqué, etc. There are online services and software (for a fee) to calculate prices and create offers. Most software also offers features to create forms.
Each brand has its own color numbering system and this greatly complicates the management of embroidery designs. These colors do not appear to be based on any other base system. Some brands provide equivalence tables with the Pantone color chart, popular among graphic designers and in the textile and plastics industries. However, the Pantone system includes thousands of colors while yarn manufacturers only have hundreds. Finally, it is almost impossible to find tables of correspondence between digital colors (RGB, HSL, etc.) and thread colors.
In summary, it’s almost impossible to know what a brand’s color looks like without having the yarn in front of you. And without a Pantone color chart it is difficult to identify it. Because color charts found online are unreliable due to differences in screen calibration, good quality printed versions must be ordered. Refer to the Links section at the end of this article for some RGB/Pantone conversion charts.
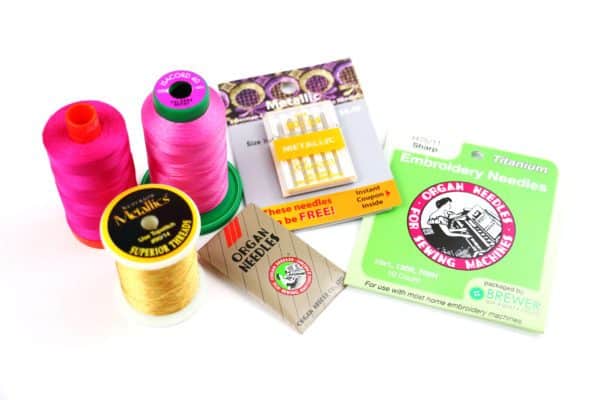
In machine embroidery, we generally use needles H-E or H between 70 and 90. The Elna 8300 manual specifies that a 75/11 needle should be used for fine fabrics and a 90/14 needle for medium fabrics to heavy. The needle type recommended by the Brother PR1050X manual is Organ’s HAX 130 EBBR, available in sizes 65/9, 70/10, 75/11, 80/12 and 75/14. Schmetz needles of the 130/705 H-E system can be used as replacements.
Most typical needle for embroidery (“family” and semi-professional machines like the Brother PR)
Needle for embroidery and sewing machines
4 Types of fabrics and fibers
The fabric has a decisive impact on the result of an embroidery. This is why the choice of fabric must be considered according to the desired result, bearing in mind that certain types of fabrics are more difficult to embroider, since they are stretchy. The stretch fabric can be stabilized in several ways which can be combined:
By using a stabilizer (cf. Hoops and stabilizers in machine embroidery),
By using an appropriate underlay,
When embroidering in different directions
As soon as you embroider large surfaces, you can observe an inevitable contraction of the threads and which can lead to the appearance of “white” between the embroidery elements, and this despite a good stabilization strategy. This is remedied by two tactics:
By using traction compensation, i.e. we enlarge the embroidery by 1-3mm or a small percentage.
By overlapping the elements.
Other fabrics such as bath towels and fleeces have the problem that fine grain seams can visually “wash out” i.e. the fabric is not covered by the embroidery. In this case, the use of a soluble stabilizer on top makes it possible to alleviate the problem.
The most common fabric types are: canvas, cotton, corduroy, denim, felt, leather, nylon, lycra, wool knit, terry, twill, woven. It is advisable to start with well-woven cotton or canvas to start. That said, you can easily do a little embroidery on any flexible fabric if it’s stabilized.
To know: software like Stitch Era – machine embroidery software and hotfix can adjust parameters (in particular density and compensation) to the type of fabric chosen (Embroidery -> Material or in the Art-to-Stitch pop-up, Stitch Settings panel).
There are also specialized fabrics to create patches (crests). These fabrics are non-woven and thick and therefore do not move. Some are “structured”, like STEP polyester, that is to say they look like an embroidery pattern and allow you to avoid embroidering large areas of background, the result of which would not be so convincing.
Additional Information:
To find out which stabilizer to use with which fabric, read Machine embroidery hoops and stabilizers, which stabilizer for which fabric
To find out which needle to choose, read Needle for embroidery and sewing machines
5 Effects of filling
There are many types of stitches, but we can distinguish five main types according to their function: forward stitches to create lines, satin stitches to create lines or other thick “columns”, filling stitches used to fill larger sections in different ways.
Ripka, Mychko and Deyneka (2014) in a literature review, identified several taxonomies. The article embroidery stitches describes the most important shapes. A first question is how to fill embroidery objects without too much distortion created by the fact that a fill can pull (pull) or widen (push). A rule of thumb is to use a variety of points and directions, for two reasons:
The push/pull effect can be reduced,
The design is going to be more interesting.
Good scanning software should help do this.
A second question concerns density. In programs like Stitch Era, density is measured in terms of lines/mm. For example, its default density of 5 for “normal” fabric means one stitch every 0.2mm, which is quite dense. decrease or increase
Related Posts
Discover relevant articles, tutorials, and tips to improve your skills and explore new techniques.
Stay inspired and connected to our embroidery community.
