Sewing Your Way to Style: How to Make Embroidered Patches with Your Sewing Machine
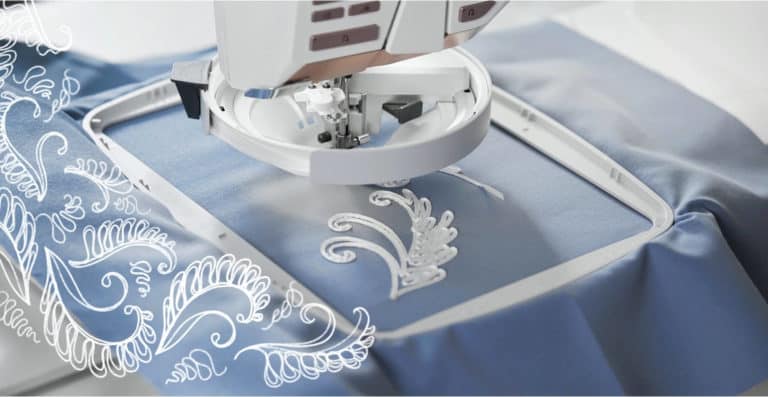
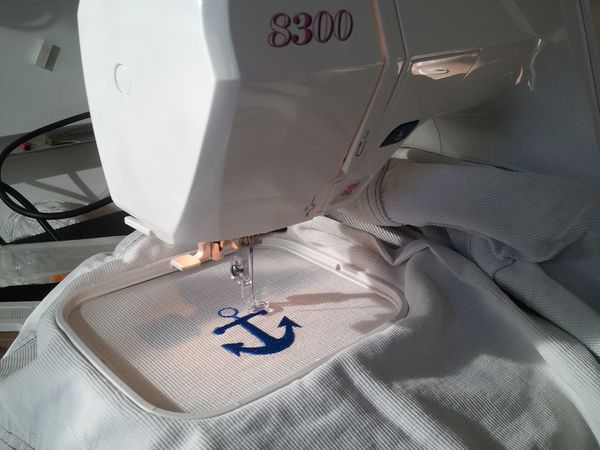
Embroidered patches add a touch of personality and flair to clothing, bags, and accessories. But who says you need a fancy embroidery machine to create them? With a regular sewing machine and a bit of creativity, you can craft stunning embroidered patches from the comfort of your home. This guide delves into the world of DIY embroidered patches, equipping you with the essential steps, techniques, and tips to bring your patch ideas to life.
Gathering Your Supplies: Building Your Patch-Making Arsenal
Before diving into the stitching fun, assemble the tools you’ll need:
- Sewing Machine: Your trusty sewing machine is the heart of this project. Ensure it has basic embroidery functions like a satin stitch and the ability to adjust stitch length.
- Fabric: Choose fabric for your patch base. Felt is a popular option due to its affordability, ease of stitching, and ability to hold its shape. Other options include cotton canvas, denim, or linen for a more structured look.
- Embroidery Floss: Opt for high-quality embroidery floss in colors that complement your design. Consider using multiple colors for a more intricate look.
- Embroidery Needles: Embroidery needles are generally sharper and finer than regular sewing needles. They pierce fabric cleanly and prevent snags.
- Scissors: Sharp fabric scissors are essential for cutting out your patch shape and trimming embroidery floss.
- Pencil or Fabric Marker: Use a pencil or fabric marker for marking your design onto the fabric.
- Embroidery Hoop (Optional): While not strictly necessary, an embroidery hoop can help keep your fabric taut and stable for easier stitching.
- Fusible Webbing (Optional): This double-sided adhesive sheet helps secure your finished patch onto another fabric before sewing it permanently in place.
Designing Your Patch: From Sketch to Stitchable Masterpiece
The creative spark comes alive in the design phase. Here are some tips to bring your patch ideas to life:
- Find Inspiration: Browse online resources, magazines, or even your own wardrobe for patch design inspiration. Animals, flowers, geometric patterns, or motivational quotes are all popular choices.
- Sketch Your Design: Roughly sketch your design on paper or use a digital illustration tool. This helps visualize the final product and refine details.
- Keep it Simple (for Beginners): For first-time patch makers, start with a simple design with clean lines and bold colors. Complex designs with intricate details can be more challenging to stitch.
Pro Tip: If you’re unsure about your design skills, consider tracing a simple image from a coloring book or using a pre-made embroidery pattern for inspiration.
Prepping Your Patch Fabric: Cutting and Marking
Once you’ve finalized your design, it’s time to prepare the fabric for stitching:
- Cut the Fabric: Cut out a square or circle of fabric slightly larger than your design. The exact size will depend on your design and desired finished patch size. Consider adding a small seam allowance around the edge for a clean finish later.
- Transfer Your Design: There are several ways to transfer your design onto the fabric:
- Trace Directly: For simple designs, carefully trace the design onto the fabric using a pencil or fabric marker.
- Use Carbon Paper: Slip a sheet of carbon paper under your fabric and trace your design onto the fabric with a pen. The carbon paper will leave a faint blue or black outline on the fabric.
- Print and Transfer: Print a mirror image of your design on temporary transfer paper specifically designed for fabric. Follow the instructions on the transfer paper to iron the design onto the fabric.
Remember: Markings should be easily visible but light enough to disappear under stitching later. Consider washing your fabric after marking to remove any faint pencil lines.
Embroidering Your Design: Stitching with Style
Now comes the exciting part – transforming your design into a stitched masterpiece! Here’s a step-by-step guide:
- Thread Your Machine: Thread your machine with embroidery floss, leaving a long tail for tying off later.
- Choose Your Stitch: Most embroidery on sewing machines utilizes the satin stitch. This stitch creates a dense, filled look ideal for filling in shapes and letters. Refer to your machine’s manual for instructions on selecting and adjusting the satin stitch settings.
- Start Stitching: Begin stitching your design outline. For clean lines, use a short stitch length and carefully follow your markings.
- Filling In: Once the outline is complete, start filling in enclosed areas with the satin stitch. Work your way from one side of the design to the other, ensuring stitches are close together for a smooth, filled look.
- Color Changes: If your design uses multiple colors, tie off the thread securely after finishing a section with one color. Then, thread the machine with a new color and continue stitching from where you left off.
Pro Tip: To prevent raw edges of your floss from fraying, consider using a technique called “flossing with a loop.” This involves threading a needle with a loop of floss instead of threading the floss itself. You can find tutorials on “flossing with a loop” online.
Finishing Touches: From Trimming to Securing
After completing the embroidery, here’s how to add those final touches to your patch:
- Trim Excess Fabric: Carefully trim away any excess fabric around the embroidered design, leaving a small border (around 1/8 inch) if desired. Pinking shears can help prevent fraying on some fabrics.
- Finishing the Edges (Optional): For a more polished look, you can finish the edges of your patch with a blanket stitch or a zigzag stitch using your sewing machine.
- Securing the Patch (Optional): If you plan to sew the patch directly onto another fabric, you can skip this step. However, if you want to add a layer of stability and make the patch easier to handle, consider using fusible webbing:
- Cut a piece of fusible webbing slightly smaller than your patch.
- Iron the rough side of the fusible webbing onto the back of your finished patch following the instructions on the product packaging.
- Peel off the paper backing from the fusible webbing.
- Position your patch onto the desired fabric and iron it firmly in place according to the fusible webbing instructions. This creates a temporary bond that allows you to easily sew the patch onto the fabric permanently.
Embellishing Your Patches (Optional):
Once you’ve mastered the basics, unleash your creativity and add some extra flair to your patches with embellishments like:
- Beads: Sew on small beads to add a touch of sparkle or create accents within your design.
- Buttons: Attach small buttons for a unique 3D effect.
- Sequins: Sew on sequins for a glamorous touch.
- Fabric Scraps: Incorporate small pieces of fabric in different colors or textures to add dimension to your patch.
Remember: Keep embellishments secure and ensure they won’t snag or interfere with the functionality of the patch.
Bringing Your Patches to Life: Inspiring Project Ideas
Now that you’ve crafted beautiful embroidered patches, here are some exciting ways to incorporate them into your projects:
- Personalize Clothing: Embroidered patches can give new life to old jeans, jackets, or t-shirts.
- Upcycle Bags: Add a touch of personality to tote bags, backpacks, or purses with a custom-made patch.
- Embellish Hats: Jazz up a plain hat with a vibrant embroidered patch.
- Create DIY Gifts: Handmade embroidered patches make thoughtful and unique gifts for friends and family. Sew them onto handkerchiefs, phone cases, or notebooks.
- Home Decor Accents: Embroidered patches can add a personal touch to throw pillows, blankets, or even curtains.
With a little practice and creativity, the possibilities for using your embroidered patches are endless!
Beyond the Basics: Troubleshooting and Advanced Techniques
As you embark on your embroidered patch-making journey, you might encounter some challenges. Here are some tips for troubleshooting and exploring advanced techniques:
- Thread Tension: Improper thread tension can lead to loose stitches or thread breakage. Refer to your machine’s manual for adjusting tension settings.
- Puckering Fabric: If your fabric puckers while stitching, try using a stabilizer or loosening the tension slightly.
- Lettering: Once comfortable with basic embroidery, try your hand at lettering techniques like satin stitch or backstitch to create personalized patches with names or initials.
- Applique Techniques: Combine embroidery with applique techniques by adding pre-cut fabric shapes onto your patch base and then embellishing them with embroidery details.
By understanding these troubleshooting tips and venturing into advanced techniques, you can refine your embroidered patch-making skills and create truly unique and stunning pieces.
Embrace the Craft and Stitch Your Way to Style!
The beauty of making embroidered patches with a sewing machine lies in its simplicity and endless creative possibilities. With the techniques and tips outlined in this guide, you’re well-equipped to embark on your patch-making journey. So, grab your sewing machine, unleash your creativity, and start stitching your way to personalized style!
Related Posts
Discover relevant articles, tutorials, and tips to improve your skills and explore new techniques.
Stay inspired and connected to our embroidery community.


