Welcome, embroidery enthusiasts, to a comprehensive guide designed to elevate your stitching skills! Whether you’re a complete novice or a seasoned stitcher, there’s always something new to learn in the delightful world of embroidery. This post dives deep into essential techniques, offering valuable knowledge for beginners and introducing advanced concepts to broaden your creative horizons.
Embroidering Basics: A Foundation for Success
Before we delve into intricate stitches, let’s solidify the fundamentals. Here’s what you’ll need to get started:
- Embroidery hoop: Keeps your fabric taut and prevents puckering. Choose a size appropriate for your project.
- Fabric: Opt for tightly woven fabrics like cotton or linen for better stitch definition.
- Embroidery needles: Sizes vary depending on thread thickness and fabric weight. Sharper needles are ideal for finer fabrics.
- Embroidery floss: Choose high-quality threads in colors that complement your design. Six-stranded floss is the most common type.
- Embroidery scissors: Sharp scissors ensure clean thread cuts.
- Embroidery pattern: This can be a pre-printed design, a digital file, or even a freehand drawing on your fabric.
Threading the Needle: Mastering the Basics
- Separate a strand: Most embroidery floss comes in six strands. For most projects, you’ll separate two to three strands depending on the desired thickness.
- Cut a length: Aim for a strand approximately 18-20 inches long.
- Thread the needle: Loop one end of the floss and thread it through the eye of the needle, leaving a tail at the opposite end.
- Knotting the end: Secure the floss with a simple knot close to the needle’s eye.
The Stitches that Make Magic: A Beginner’s Guide
Now that you’re prepped, let’s explore some fundamental embroidery stitches:
- Running stitch: This basic stitch creates a continuous line and forms the foundation for many other stitches. Make small, even stitches with the needle going up and down through the fabric.
- Backstitch: This stitch secures your work and prevents thread from unraveling. Make a small stitch forward, then bring the needle back a stitch length, pushing the thread under the previous stitch before going forward again. Repeat for a secure line.
- Straight stitch: Similar to running stitch but with spaces between each stitch. This creates a dotted line effect.
- Satin stitch: Creates a smooth, solid surface. Make small, close stitches side-by-side, completely covering the fabric underneath.
- French knot: A decorative knot that adds a raised, 3D effect. Wrap the thread around the needle a few times, hold it down with your thumb, then push the needle through the fabric, leaving the knot on the surface.
Beyond the Basics: Exploring Advanced Embroidery Techniques
As your skills grow, venture into more intricate techniques that add depth and dimension to your projects:
- Stem stitch: Ideal for creating outlines and stems. Make diagonal stitches, one on top of the other, following the desired line.
- Lazy daisy stitch: Creates a delicate daisy-like flower. Make a small circle of satin stitch, then radiating straight stitches around the circle.
- Blanket stitch: Creates a decorative edging or can be used to join two pieces of fabric. Make small diagonal stitches that catch the edge of one fabric and loop under the other fabric’s edge.
- Appliqué: Sew a pre-cut fabric shape onto another fabric using decorative stitches for a layered effect.
- Free-motion embroidery: Detach the embroidery hoop and move the fabric freely under the sewing machine needle to create organic shapes and designs.
Essential Tips and Tricks for Flawless Embroidery
- Transfer your design: Use transfer paper, a water-soluble pen, or a light source to trace your embroidery pattern onto your fabric.
- Sharpen your needles: Blunt needles snag and damage fabric. Invest in a needle sharpener for continuous smooth stitching.
- Relax your grip: Avoid holding the thread too tightly, as this can cause tension and puckering of the fabric.
- Practice even tension: Maintain consistent tension on the thread as you stitch for clean and uniform results.
- Experiment with color: Don’t be afraid to play with color combinations to create unique and vibrant designs.
- Finishing touches: Once your embroidery is complete, press it with a warm iron to flatten stitches and remove wrinkles. You can also frame it or use it to embellish clothing, bags, or home decor items.
Developing Your Design Skills:
- Sketch your own designs: Don’t be limited by pre-made patterns. Sketch simple shapes, flowers, or lettering to create your own unique motifs.
- Trace from life: Use leaves, flowers, or other natural objects as inspiration. Place them on your fabric and trace their outlines for a natural aesthetic.
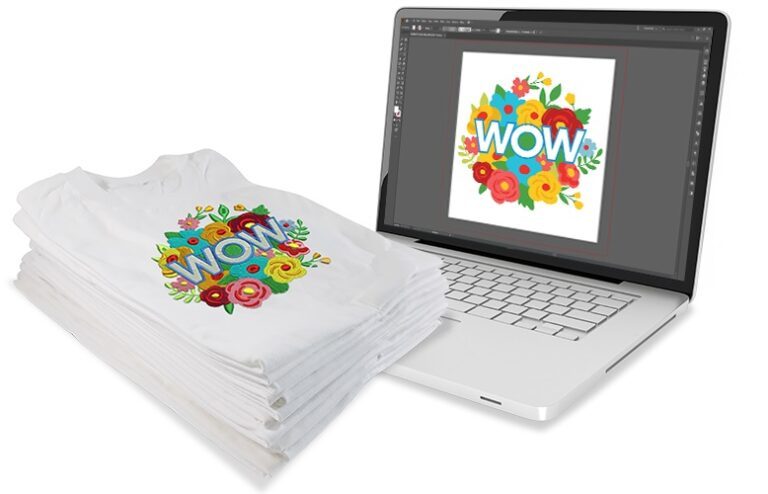
- Digitize photos: Convert photos or illustrations into embroidery patterns using specialized software. This allows you to incorporate personal images into your projects.
- Combine techniques: Don’t be afraid to mix and match different stitches and embellishments within a single project. Experiment with textures and layering to create depth and interest.
Resources for Embroidery Enthusiasts:
- Embroidery books and magazines: Find a wealth of inspiration, patterns, and tutorials in embroidery publications.
- Online embroidery communities: Join online forums and social media groups to connect with other stitchers, share your work, and learn from others.
- Embroidery classes and workshops: Consider taking a class or workshop to learn new techniques and get hands-on guidance from experienced instructors.
- Download our 3 Free Books Here
Troubleshooting Common Embroidery Problems:
- Puckered Fabric: This is usually caused by uneven tension. Loosen the fabric slightly in the hoop and re-tighten as you stitch.
- Thread breaks: Blunt needles or using too much thread can cause breaks. Ensure your needles are sharp and use the appropriate number of floss strands for your fabric and stitch.
- Uneven Stitches: Practice maintaining consistent tension on your thread and focus on making stitches of similar length.
- Knots on the wrong side: These can be unsightly. Try burying the knot under a few stitches at the beginning of your work.
The Art of Embroidery: A Journey of Skill and Self-Expression
Embroidery is more than just creating beautiful stitches; it’s a journey of learning, exploration, and self-expression. With dedication and a little practice, you’ll master essential techniques, develop your design skills, and discover the joy of creating unique and personalized pieces. So, grab your needle and thread, embrace the creative process, and let your imagination blossom with every stitch!
Bonus Section: A Beginner-Friendly Embroidery Project
Feeling inspired? Here’s a simple yet charming project to get you started:
Embroidered Floral Hoop Art
Materials:
- Embroidery hoop (4-inch diameter)
- White cotton fabric (slightly larger than the hoop)
- Embroidery floss (various colors of your choice)
- Embroidery needle
- Embroidery scissors
- Water-soluble pen
- Pencil and paper (optional, for sketching your design)
Instructions:
- Prepare your fabric: Cut the fabric to a size a few inches larger than your embroidery hoop.
- Transfer your design: Sketch some simple flowers on paper first (optional), or use a pre-printed floral pattern. Using a water-soluble pen, lightly trace your design onto the fabric.
- Set up your hoop: Loosen the screw on the embroidery hoop, place the fabric over the inner hoop, and then tighten the screw to secure the fabric taut.
- Choose your stitches: For this project, we’ll use a combination of basic stitches. Use a backstitch for the flower outlines, French knots for the flower centers, and lazy daisy stitches for the flower petals. You can also experiment with other stitches you’ve learned.
- Embroider your design: Thread your needle with your chosen color and begin stitching according to your traced design. Refer to the explanations above for each stitch if needed.
- Finishing touches: Once your embroidery is complete, tie a knot at the end of the thread and weave it under a few stitches on the backside to secure it. Trim any excess thread close to the knot.
- Frame your art: Cut away any excess fabric around the hoop, leaving a clean edge. You can display your beautiful hoop art as is or add a decorative ribbon around the outer hoop for an extra touch.
Remember, embroidery is a relaxing and rewarding hobby. Embrace the learning process, have fun experimenting, and enjoy the satisfaction of creating something unique and beautiful with your own hands!
Related Posts
Discover relevant articles, tutorials, and tips to improve your skills and explore new techniques.
Stay inspired and connected to our embroidery community.


