Applique Magic with Your Embroidery Machine: Tips for Stunning Results
Embroidery machines unlock a world of creative possibilities, and applique adds a delightful dimension to your projects. By fusing fabric pieces onto a background fabric, you can create vibrant designs, personalized gifts, and charming home decor. But achieving flawless applique with your machine requires specific techniques and knowledge. Fear not, embroidery enthusiasts! This guide delves into essential tips to help you master applique and transform your machine into a tool for stunning fabric art.
Preparing the Perfect Canvas: Fabrics for Applique Success
The foundation for beautiful applique lies in the fabric choices. Here’s what to consider:
- Background Fabric: Opt for a stable woven fabric that can withstand the heat and pressure of embroidery stitching. Cotton woven fabrics like quilting cottons or poplin are excellent choices. Avoid stretchy materials that may distort during embroidery.
- Applique Fabrics: The possibilities are endless! Choose fabrics that complement your design and add visual interest. Popular options include felt, wool, cotton, and even lightweight synthetic fabrics. Test different fabrics on a scrap piece before incorporating them into your project to ensure they adhere well and handle embroidery stitching without fraying.
Pro Tip: Starch the background fabric lightly to provide extra stability and prevent puckering during applique stitching.
Interfacing Your Applique Shapes: Adding Strength and Stability
For a professional finish and to prevent fraying, interfacing your applique shapes is crucial. Here are some interfacing options:
- Fusible Webbing: This is a popular choice for small to medium-sized applique shapes. Apply the fusible webbing to the backside of your applique fabric following the manufacturer’s instructions, then iron it onto your pre-cut applique pieces.
- Heat n’ Bond Lightweight: This interfacing provides slightly more structure than fusible webbing and is ideal for intricate applique details or slightly heavier fabrics.
- Non-Fusible Interfacing: Use this for larger applique shapes that require additional stability. Adhere the interfacing to the back of your applique fabric with a temporary fabric adhesive spray or glue stick, then stitch around the shape’s edges to secure it in place.
Remember: Choose the interfacing weight and type based on the applique fabric’s weight and overall design complexity.
Tools of the Trade: Essential Supplies for Machine Applique
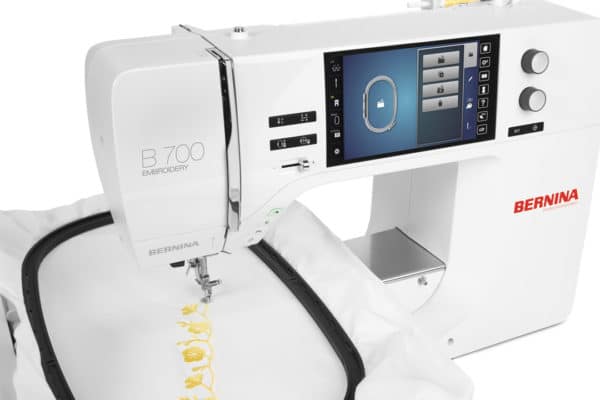
- Embroidery Machine: With various applique stitch options (satin stitch, blanket stitch, zigzag stitch, etc.), your machine is your creative partner.
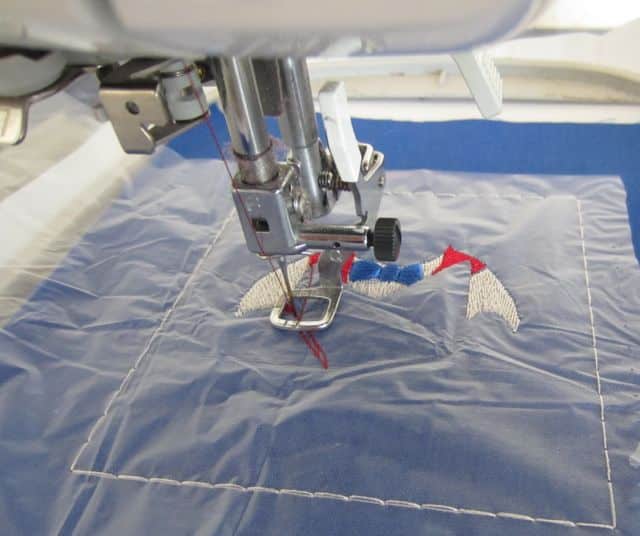
- Stabilizer: Use a water-soluble stabilizer for raw-edge applique or a tear-away stabilizer for applique with a satin stitch finish. Stabilizers prevent the background fabric from puckering and ensure smooth stitching.
- Fabric Scissors: Sharp fabric scissors are essential for precise cutting of applique shapes. Consider investing in dedicated applique scissors with a small, pointed tip for intricate details.
- Fabric Marking Pen: Use a heat-soluble or water-soluble pen to mark placement lines for your applique pieces on the background fabric.
- Embroidery Hoop: Choose a hoop size that comfortably accommodates your entire applique design.
- Adhesives: Temporary spray adhesive or glue sticks can be helpful for positioning applique pieces before stitching them in place.
Mastering the Art of Cutting: Techniques for Flawless Applique Shapes
- Templates: Create paper or cardboard templates for your applique shapes. Trace the templates onto your chosen applique fabric and cut them out.
- Die Cutters: For precise and consistent shapes, especially with intricate designs, invest in embroidery applique dies and a compatible die-cutting machine.
- Heat Cut Tools: Some machines offer built-in heat cutting capabilities. Utilize these if your machine has this feature to directly cut your applique shapes from the chosen fabric.
Important Note: Always reverse your applique shapes if the design features text or lettering to ensure it reads correctly after being stitched onto the background fabric.
Choosing the Right Stitch: Embracing the Power of Applique Stitches
Embroidery machines offer a variety of stitches ideal for applique. Here are some popular options:
- Satin Stitch: This is a go-to stitch for creating a smooth, decorative edge around your applique shapes. Experiment with different stitch widths to achieve the desired effect.
- Blanket Stitch: This stitch offers a more casual finish while still securing the applique piece in place. It’s a good choice for adding a touch of texture to your projects.
- Zigzag Stitch: This stitch provides a secure hold for applique pieces and can be used for both straight and curved edges.
- Decorative Stitches: Many machines offer specialized decorative stitches that can enhance the visual appeal of your applique. Explore the options available on your machine and experiment with creative stitch combinations.
Tip: When selecting an applique stitch, consider the size and intricacy of your design, as well as the desired finished look.
The Magic Touch: Stitching Strategies for Flawless Applique
Now that you’ve chosen your perfect applique fabrics, mastered cutting techniques, and selected the ideal stitch, it’s time to bring your design to life! Here are some essential stitching strategies for flawless applique with your embroidery machine:
Securing Your Applique:
- Temporary Adhesive: For added control and to prevent applique shapes from shifting during stitching, use a small amount of temporary spray adhesive or a glue stick to secure the applique pieces onto the marked positions on your background fabric.
- Placement Hooping: When using a hoop, ensure the applique pieces lay flat and wrinkle-free within the hooping area. Avoid excessive tension that might distort the shapes.
Stitch Order and Overlap:
- Start from the Center: Begin stitching from the center of your applique design and work your way outwards. This approach minimizes any puckering or distortion around the edges.
- Stitch Overlap: When using a satin stitch or other decorative stitch for the applique edge, ensure the stitches slightly overlap the raw edge of the applique fabric. This encloses the fabric edge and prevents fraying.
- Compensate for Stitch Density: Dense applique stitches can cause the applique piece to shrink slightly. To counteract this, consider using a slightly larger applique shape compared to the final desired size in your design.
Advanced Applique Techniques:
- Reverse Applique: This technique involves stitching the applique shape onto the background fabric, then carefully cutting away the excess background fabric from within the stitched outline. This creates a unique, layered effect.
- In-the-hoop Applique: Some embroidery machines offer specialized in-the-hoop applique features. These may involve cutting and fusing applique shapes directly within the hooping frame using the machine’s capabilities. Explore your machine’s manual to see if it offers such functionalities.
Finishing Touches:
- Trimming Excess Threads: Carefully trim any loose threads or jump stitches with sharp embroidery scissors.
- Pressing (Optional): For a crisp, professional finish, lightly press your completed applique project from the backside using a cool iron setting appropriate for the fabric types used.
By following these tips and practicing your applique techniques, you’ll be well on your way to creating stunning, personalized projects with your embroidery machine. Remember, experimentation is key! Don’t be afraid to try different applique fabrics, stitches, and design elements to discover your own unique style.
Bonus Tip: Invest in a magnifying lamp for close-up work while stitching intricate applique details.
With a little practice and these helpful insights, you can transform your embroidery machine into a powerful tool for creating beautiful and captivating applique masterpieces. Happy stitching!
Related Posts
Discover relevant articles, tutorials, and tips to improve your skills and explore new techniques.
Stay inspired and connected to our embroidery community.

