Learn essential techniques and tips to easily hoop and embroider bulky items.
HOOPING HINTS
• Personalizing sweatshirts, blankets, quilts and towels
with embroidery is fun, but the biggest challenge is
properly hooping these bulky items. The item weight
and bulkiness causes the article to pull away from
the stabilizer and shift into incorrect positions due
to the embroidery arm movement. Bulky items need a
semi-permanent bond to the stabilizer to prevent shifting.
• Hoop the fabric and stabilizer as one unit in the
hoop whenever possible to prevent the fabric
from shifting in the hoop during stitching.
• Loosen the hoop screw as much as possible. To prevent
loosening the screw too much and losing the nut,
place the outer hoop ring inside a plastic bag
before unscrewing.
Place the outer ring over a non-slip surface to prevent
the ring from shifting during hooping . Use
a non-slip shelf liner or a hoop alignment tool.
• When fabric and stabilizer combinations are
too bulky to fit between the hoop rings, even with
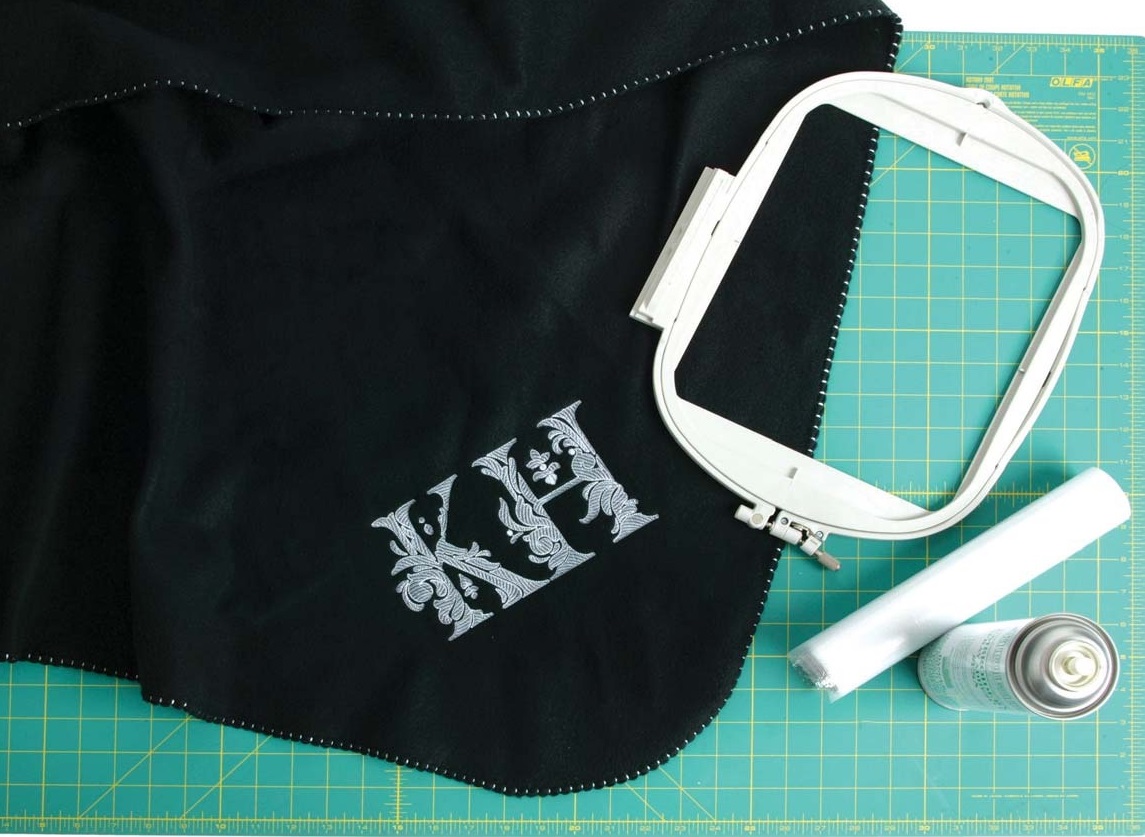
the screw loosened completely, utilize hoopless
embroidery techniques for best results. Hoopless
embroidery is the process of only hooping stabilizer,
and then attaching fabric to the stabilizer using
temporary spray adhesive or specialty stabilizer.
• Select the appropriate stabilizer for the item,
and then hoop the stabilizer.
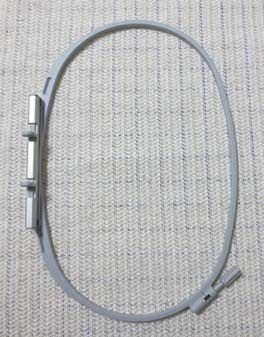
• Mark the horizontal and vertical centelines directly
onto the hooped stabilizer, using the plastic hoop
template if available.
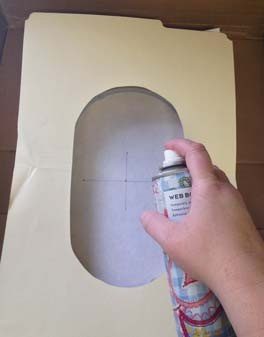
• Spray the stabilizer with temporary spray adhesive.
To protect the hoop from the adhesive spray, cut
a hole in the center of a manila folder according to
the hoop inner dimensions. Place the folder over the
hoop before spraying the adhesive Or purchase
a professional hoop guard to protect the hoop.
• Mark the design centerlines onto the fabric in the
desired area. Position the fabric over the stabilizer,
aligning the center markings; finger-press to secure.
• Place the hoop onto the machine. Move the
needle position to the marked center on
the fabric. Lower the needle to double check
proper placement. Adjust the needle if necessary
using the machine’s edit or move feature.
SPECIALTY STABILIZER
• Specialty stabilizers provide a more secure bond
between the stabilizer and fabric than temporary
spray adhesive.
• Paper-backed pressure sensitive adhesive stabilizer
has a paper coating over a pressure-sensitive
adhesive surface.
• Hoop the stabilizer with the adhesive side facing
up. Mark the design centerlines onto the stabilizer
wrong side using a dark marking pen so the markings
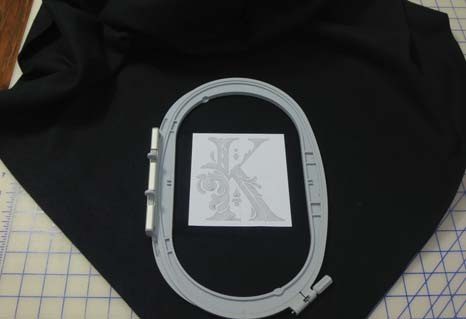
are visible on the right side. Score the paper
lining and peel it away, revealing the adhesive.
Position the fabric over the stabilizer, aligning the
centerlines; finger-press to secure. Place the hoop
onto the machine, and then embroider the design.
• Water-activated adhesive stabilizer has one side
coated with a surface that becomes tacky when
moistened. Once the stabilizer dries, it creates
the most secure bond, making shifting the fabric
from the stabilizer practically impossible.
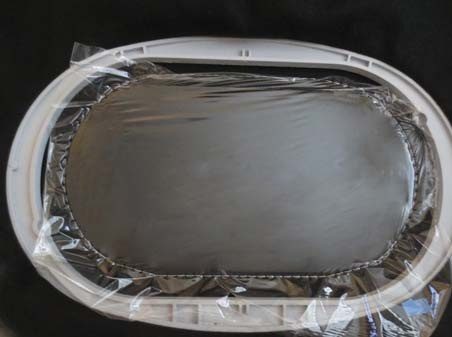
• Hoop the stabilizer with the shiny side facing
up. Mark the design centerline onto the stabilizer
wrong side. Lightly moisten the stabilizer
right side using a damp sponge. Position the fabric
over the stabilizer, aligning the centerlines;
gently smooth into place. Allow the stabilizer
to dry for a few minutes. Place the hoop onto
the machine, and then embroider the design.
• To remove the stabilizer, gently pull the fabric away
from the stabilizer and moisten the area. Continue
to lift and moisten, and then tear away any excess.
POSITIONING POINTERS
• Positioning the excess fabric from a bulky item in
the correct direction decreases the pulling and
distortion from the fabric weight during stitching.
• Always position excess fabric to the left of the
needle, letting the fabric move over the hoop
bracket and/or embroidery module
Never leave the machine unattended
when stitching bulky items.
Always observe the stitching and
adjust the excess fabric as needed.
The limited room between the right of the needle and
the machine’s “wall” means the excess fabric needs to
be rolled or pinned out of the way, which can easily
catch under the needle or hoop, or the excess fabric
can completely impede the hoop movement.
• To correctly position excess fabric, print a paper design
template with the centerlines indicated. Before
trimming the paper, draw an arrow at the design
upper edge denoting the correct design direction.
Place the template over the fabric in the desired orientation.
Transfer the design centerlines and arrow
onto the fabric using a removable fabric marker.
• Center the hoop over the template and fabric.
Determine whether the excess fabric is positioned
to the left of the needle. The design upper edge on
the hooped fabric doesn’t always need to align
with the hoop upper edge.
• For example, positioning the hoop bracket
vertically on the blanket allows the excess fabric
to extend toward the machine back, which
causes drag and pulling during stitching .
• If the hoop bracket is placed horizontally along the
design lower edge, the excess fabric extends to
the machine right and impedes accurate stitching .
• Placing the hoop bracket horizontally and along the
design upper edge, the excess fabric extends to
the left of the needle and prevents fabric shifting .
• After hooping the item following one of the
previous techniques, place the hoop onto the
machine. Check that the design orientation on
the machine screen corresponds with the hooped
fabric. If needed, rotate the design on the machine
screen to match the fabric orientation.
BASTING BOXES
• Use a baste-in-the hoop outline stitch to temporarily
attach the fabric to the stabilizer along the hoop
perimeter .
• Some machines have built-in baste-in-the hoop
designs. If the machine doesn’t have the feature,
most embroidery machine companies provide
basting designs.
• If using a baste-in-the hoop stitch, save the file to
the machine’s memory. Load the design onto the
screen and use the add feature to bring the design
onto the screen. The basting outline stitches before
the design begins.
• If the machine isn’t able to combine designs on
the screen, load the baste-in-the hoop design
onto the screen and stitch the outline. Don’t remove
the hoop from the machine. Select the desired
design, and then embroider.
• Before stitching the baste-in-the hoop design,
decrease the machine speed. If the machine embroiders
with the foot pedal, use the pedal to control the speed during the stitching, ending the stitching
and repositioning the fabric as necessary.
• For exceptionally heavy or large items, position an
item with the same height as the machine module
next to the machine to support the fabric weight.
• To keep excess fabric away from the needle, use
large office clips or hair clips. Clip the excess fabric
to the hoop, making sure the clips don’t interfere with
the hoop movement or come loose during stitching.
Related Posts
Discover relevant articles, tutorials, and tips to improve your skills and explore new techniques.
Stay inspired and connected to our embroidery community.


Hurrah, that’s what I was looking for, what
a material! present here at this blog, thanks admin of this
site.
I have been surfing on-line more than 3 hours today, but I never
discovered any fascinating article like yours. It’s beautiful price enough for me.
Personally, if all website owners and bloggers made excellent content as you probably did, the net will be much more useful than ever before.
Just want to say your article is as astonishing.
The clarity in your post is simply excellent and i can assume you’re an expert on this
subject.