10 Common Embroidery Machine Problems (and How to Fix Them!)
The whirring symphony of your embroidery machine, the vibrant threads dancing across the fabric – there’s a certain magic to watching a design come to life stitch by stitch. But even the most seasoned embroiderer can encounter occasional hiccups along the way. Thread breaks, tension issues, and unexpected puckering can leave you frustrated and questioning your project.
Fear not, fellow stitchers! This guide delves into 10 common embroidery machine problems and equips you with the knowledge to troubleshoot and get your machine humming smoothly again.
1. Thread Breaks:
This is a frequent foe for embroiderers. Here are some culprits and solutions:
- Incorrect Threading: Double-check your threading path. Ensure the thread is following the correct guides and tension discs. Refer to your machine’s manual for specific threading instructions.
- Tension Issues: Imbalance between upper and bobbin thread tension can cause thread breaks.
- Too Tight Upper Tension: Loosen the upper thread tension slightly by turning the tension dial. A good rule of thumb: you should be able to gently pull the thread upwards with a little resistance.
- Too Loose Upper Tension: Tighten the upper thread tension slightly. The thread should not pull out easily but shouldn’t break with minimal pressure either.
- Blunt or Damaged Needle: A bent or dull needle can snag and break the thread. Replace the needle regularly, especially after stitching through thick fabrics or metallic threads.
- Rough Surfaces: Burrs or rough edges on thread guides or tension discs can snag and break the thread. Use a soft brush to gently clean these areas.
2. Tension Issues:
Uneven tension between the upper and bobbird thread can lead to a host of problems, including puckering, looping, and skipped stitches. Here’s how to tackle tension woes:
- Identify the Problem:
- Loose Upper Tension: Stitches appear loose and loopy on the top of the fabric, and the bobbin thread might show through.
- Tight Upper Tension: Stitches appear puckered and bunched together on the top of the fabric.
- Loose Bobbin Tension: Stitches appear loose on the underside of the fabric, and the upper thread might show through.
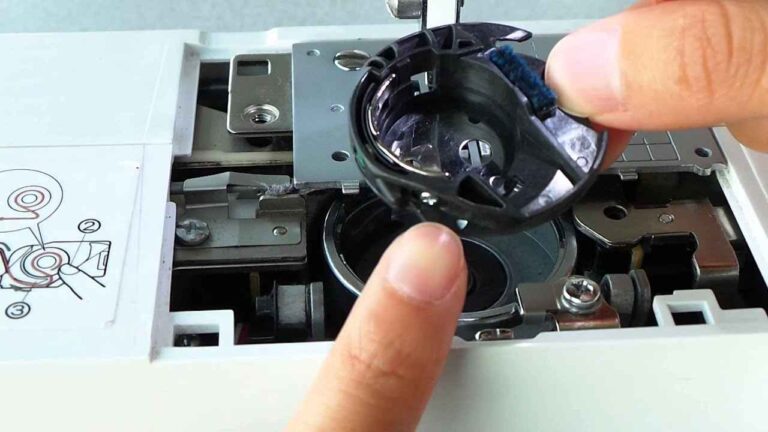
- Tight Bobbin Tension: Bobbin case feels tight and difficult to open. Stitches appear puckered on the underside of the fabric.
- Adjusting Tension: Most machines have separate tension dials for the upper and bobbin thread. Make small adjustments, test stitching on a scrap fabric after each adjustment, and observe the results.
3. Birdnesting (Thread Tangling Underneath the Hoop)
This frustrating situation occurs when the bobbin thread tangles underneath the embroidery hoop. Here are some potential causes and solutions:
- Incorrect Bobbin Winding: Ensure the bobbin is wound evenly and tightly. Loose winding can cause the thread to unravel and tangle.
- Improper Bobbin Placement: Double-check that the bobbin is inserted correctly with the thread unwinding in the appropriate direction (consult your machine’s manual).
- High Upper Thread Tension: If the upper thread tension is too tight, it can pull too much thread from the bobbin, causing loops and tangles underneath.
4. Skipped Stitches:
The design looks incomplete with missing stitches. Here are some ways to address this:
- Needle Selection: Ensure you’re using the correct needle size and type for your fabric and thread weight. A thin needle for thick fabric can struggle to penetrate and complete the stitch.
- Needle Depth: The needle depth might be incorrect. Adjust the needle depth setting according to your fabric thickness and needle size.
- Tension Issues: Improper tension can also contribute to skipped stitches. Refer to solutions mentioned in point #2 for adjusting tension.
5. Puckering or Wavy Stitches:
The fabric appears ruffled or uneven around the embroidery. Here’s how to tackle puckering:
- Hooping Technique: Ensure the fabric is hooped correctly. The fabric should be taut but not drum-tight. Avoid pulling or distorting the fabric while hooping.
- Stabilizer Selection: Use the appropriate stabilizer for your fabric weight and type. A stabilizer that’s too light won’t provide enough support, while one that’s too heavy can cause the fabric to bunch.
- Stitch Density: Dense stitch fills can cause puckering, especially on lightweight fabrics. Consider reducing the stitch density or using a different fill pattern.
6. Breaking Thread on Color Changes
- Thread Trimming Settings: Adjust the thread trimming settings on your machine. You might be able to shorten the trimming length or disable trimming altogether during color changes. Experiment to find the sweet spot.
- Manual Thread Trimming: Consider manually trimming the threads after each color change instead of relying on the automatic trimming function. This gives you more control and can prevent unnecessary thread breaks.
7. Machine Not Recognizing USB Drive:
If your machine won’t recognize the USB drive containing your embroidery files, here are some troubleshooting steps:
- Check File Format: Ensure the embroidery files on the USB drive are in a format compatible with your machine. Consult your machine’s manual for supported file formats.
- Drive Compatibility: Try using a different USB drive. Some machines might have limitations on USB drive capacity or formatting.
- Clean the USB Port: Gently clean the USB port on your machine with a compressed air can to remove any dust or debris that might be causing connection issues.
8. Error Messages:
Modern embroidery machines often display error messages to help diagnose problems. Here’s how to handle them:
- Consult the Manual: Your machine’s manual will have a troubleshooting section that decodes error messages and suggests solutions.
- Online Resources: Search online forums or the manufacturer’s website for information on specific error messages. You might find solutions from other users who have encountered similar issues.
9. Uneven Stitches:
The stitches appear uneven in length or width. Here are some possibilities:
- Improper Foot Pressure: The foot pressure might be too light or too heavy. Adjust the foot pressure setting according to your fabric thickness and stabilizer. Refer to your machine’s manual for specific recommendations.
- Worn Feed Dogs: The feed dogs are the teeth that grip the fabric and move it along during stitching. Over time, they can wear down and lose their grip, leading to uneven stitching. If the feed dogs appear worn, consider getting them replaced by a qualified technician.
10. Machine Makes Unusual Noises:
Unusual noises can indicate potential mechanical issues. Here’s what to do:
- Power Down: Turn off the machine immediately and unplug it from the power source.
- Consult the Manual: Refer to your machine’s manual for troubleshooting tips related to unusual noises.
- Seek Professional Help: For persistent noises or any concerns about the machine’s functionality, it’s best to consult a qualified embroidery machine technician.
Bonus Tip: Regular Maintenance is Key!
Preventative maintenance goes a long way in avoiding problems and ensuring your machine runs smoothly. Develop a routine for cleaning and lubricating your machine according to the manufacturer’s instructions. This might involve cleaning the bobbin case, tension discs, and needle bar, as well as oiling specific parts.
By understanding these common problems and their solutions, you’ll be well-equipped to troubleshoot embroidery machine issues and keep your creative projects stitching forward. Remember, patience and practice are your allies. Happy embroidering!
Related Posts
Discover relevant articles, tutorials, and tips to improve your skills and explore new techniques.
Stay inspired and connected to our embroidery community.
