Create a highend shawl with in-the-hoop fringe. Plus learn a variety of tricks and
techniques for stitching out fringe embroidery designs.
DESIGN
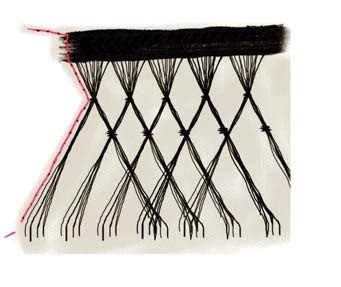
Choose an in-the-hoop fringe design that includes instructions on how to connect the fringe ends to create a continuous stitchout. Open the chosen design in embroidery software to examine the connection.
Usually, the end of the design aligns with the beginning of the next design. If using a large hoop, combine two designs using the software to avoid multiple hoopings. If the chosen border design doesn’t include connectors or if you’re creating an original border design, add an alignment line, which is a single running stitch with a long stitch length.
In the featured design, the blue alignment line runs across the fringe upper edge and follows the outermost edge (>>>). Ensure that the alignment line stitches before and after each stitchout so they align when overlapped.
FRINGE
Typically, in-the-hoop fringe designs are either embroidered as freestanding fringe or embroidered to a fabric edge in the hoop. Follow these instructions for embroidering
freestanding fringe.
• Hoop a rectangle of watersoluble stabilizer.
• Using the same color thread in the needle and the bobbin, embroider the first step. Remove
the design from the hoop and trim the stabilizer close to, but not through, the threads (<<<).
• Lightly spray the design wrong side with temporary spray adhesive.
• Hoop a rectangle of watersoluble stabilizer. (When working in a larger hoop, use two layers
of water-soluble stabilizer.)
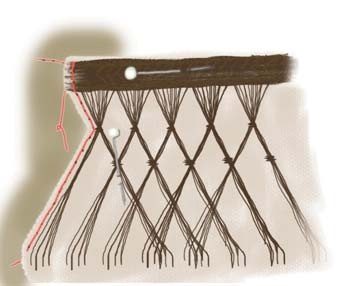
• Embroider the second step, which s the alignment line. Remove the hoop from the machine. Place the first embroidered design over the hoop and overlap the two alignment
lines. Once aligned, trim the alignment stitching from the fringe border upper edge (>>>).
• Replace the hoop on the machine and embroider the next fringe design, continuing the process until the needed fringe length is created.
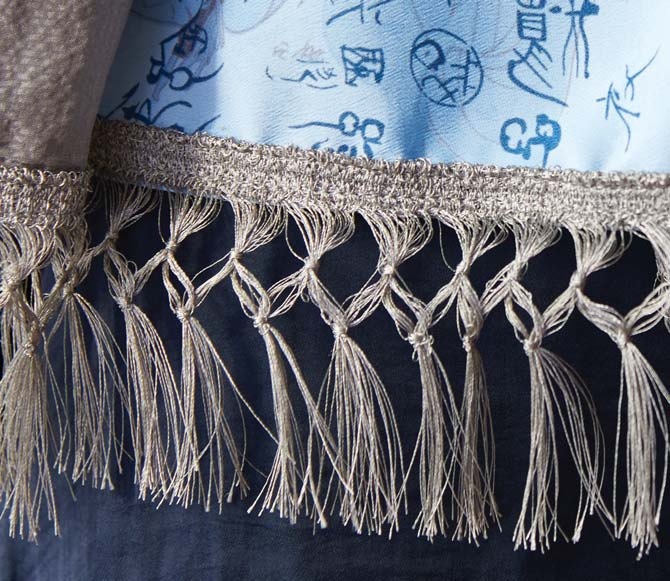
When complete, use a rotary cutter to trim the locking stitches along the
fringe lower edge. Remove the excess stabilizer, and then rinse and soak
the fringe to remove the stabilizer.
MATERIALS
+ Three 9”x54” rectangles of rayon, polyester, chiffon or silk batiste
+ Thread: all-purpose & embroidery
+ Fine sewing machine needle (optional)
+ Liquid stabilizer (optional)
+ Water-soluble stabilizer
+ Fringe embroidery design approximately 3½” wide
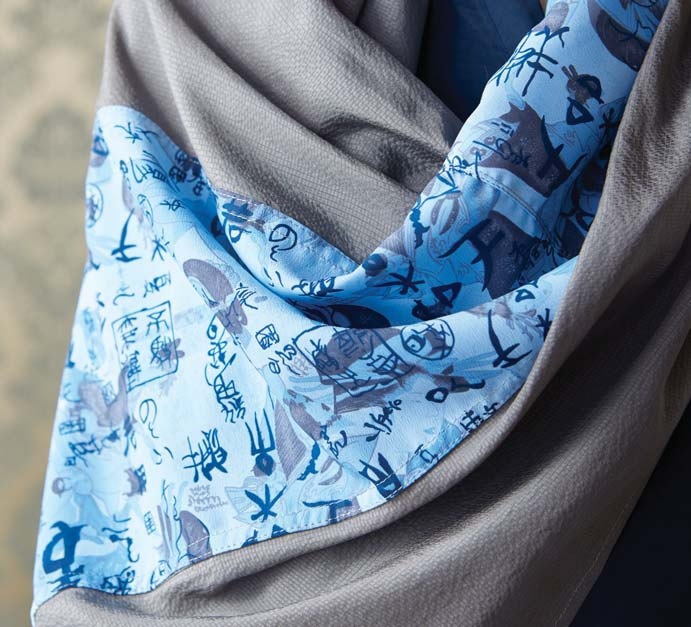
Stitch the fabrics together along the long edges to create one 25”x54” rectangle. When stitching lightweight fabrics with exposed seams, use a
French seam to encase the raw edges for a professional finish. With wrong sides together, stitch two fabrics along one long edge using a ¼” seam allowance. Press the seam to one side. Fold the fabrics with right sides together, and then stitch the same seam using
a 3/8” seam allowance, encasing the raw edge. Press the seam to one side.
(On the featured scarf, the seams were pressed toward the center fabric panel.) Topstitch the seam. Repeat to stitch the remaining panel to the opposite center-panel long edge.
• Double-fold each rectangle long edge ¼” toward the wrong side; press, and then stitch. Or use a serger and stitch a rolled hem on each long edge.
• Fold the rectangle short ends ¼”toward the wrong side; press. Fold the ends another ½” toward the wrong side; press, and then stitch.
• Measure the finished rectangle short ends; record. Add ½” to the measurement
to decipher the needed fringe length.

EMBROIDER
• Embroider the fringe designs onto water-soluble stabilizer, using matching, contrasting or variegated rayon embroidery thread, to create the necessary fringe length.
• Trim the locking stitches along the fringe lower edges. Soak and rinse the fringe to remove
the remaining stabilizer.
FINISH
• Place the rectangle right side up on a flat work surface. Place the fringe upper edge right side up along one rectangle short end; pin.
• Fold each fringe end ¼” toward the wrong side.
• Set the sewing machine for a standard running stitch. Stitch the fringe to the shawl, ¼” from the fringe-head upper and lower edges. Repeat to stitch fringe to the opposite rectangle
short end.
Related Posts
Discover relevant articles, tutorials, and tips to improve your skills and explore new techniques.
Stay inspired and connected to our embroidery community.




thank you for your advice I also love your range of designs
Can you tell us more about this? I’d love to find out some additional information.
Marvelous, what a web site it is! This webpage gives helpful information to us,
keep it up.
Hello to every , because I am actually keen of reading this website’s post to be updated regularly.
It includes fastidious stuff.