Mastering Your Embroidery Machine:
Expert Tips and Design Secrets
Embroidery machines have revolutionized the world of textile arts, allowing crafters and professionals alike to create intricate designs with precision and efficiency.
Whether you’re a beginner looking to start your embroidery journey or an experienced enthusiast aiming to refine your skills, this guide will provide you with valuable insights and expert tips to master your embroidery machine and create stunning designs.
-
Choosing the Right Embroidery Machine
Selecting the perfect embroidery machine is crucial for your success in this craft. Consider the following factors:
- Embroidery area size: Determine the maximum size of designs you plan to create.
- Built-in designs and fonts: Look for machines with a variety of pre-loaded options.
- Connectivity: USB ports, Wi-Fi capability, and computer connectivity can enhance your machine’s versatility.
- Ease of use: User-friendly interfaces and clear instructions are essential, especially for beginners.
- Brand reputation and support: Choose a reputable brand with good customer service and readily available resources.
Remember that while multi-needle machines are excellent for commercial use, single-needle machines are often sufficient for home crafters and beginners.
-
Essential Supplies and Materials
To get started with machine embroidery, you’ll need:
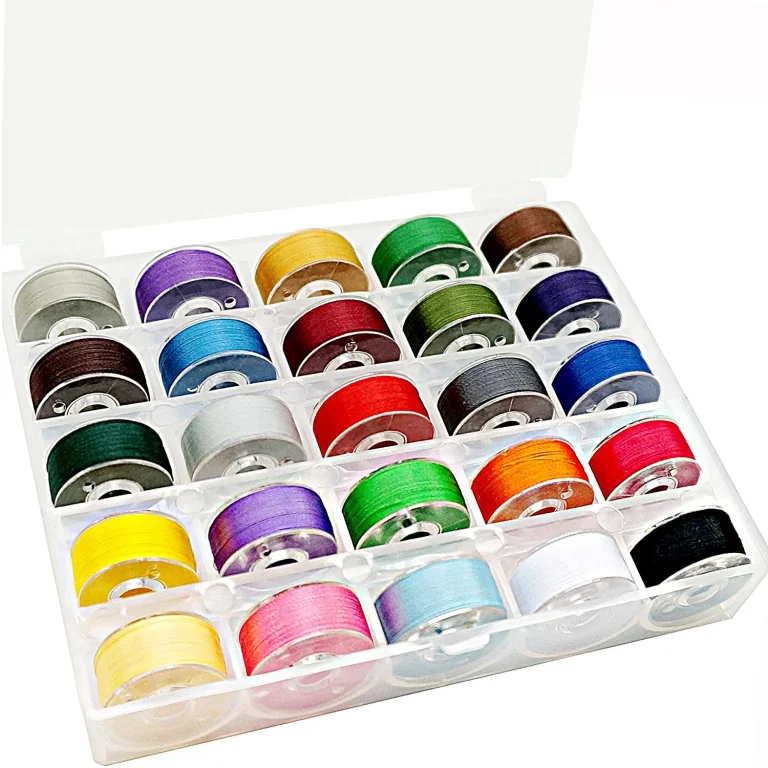
- Embroidery threads: Polyester and rayon are popular choices for their strength and sheen.
- needles: Use embroidery-specific needles, changing them regularly to maintain stitch quality.
- Stabilizers: These prevent fabric distortion and come in various types for different projects.
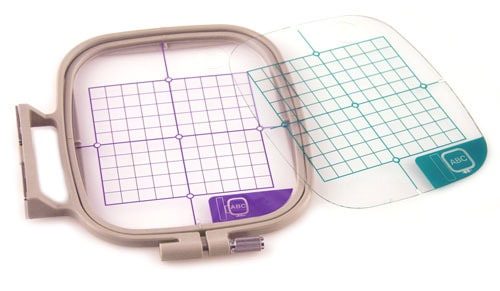
- Hoops: Ensure you have hoops in various sizes to accommodate different design dimensions.
- Scissors and snips: Invest in high-quality tools for precise cutting and thread trimming.
- Bobbin thread: Opt for a lightweight, strong thread specifically designed for bobbins.
-
Understanding Embroidery Designs
Embroidery designs are the heart of your projects. Here’s what you need to know:
- File formats: Familiarize yourself with common formats like .pes, .dst, and .jef.
- Design sources: Explore free designs online, purchase from reputable digitizers, or create your own.
- Sizing and editing: Learn to resize and modify designs to suit your projects without compromising quality.
- Design density: Understand how stitch density affects the final look and feel of your embroidery.
- Color changes: Plan your thread changes efficiently to minimize production time.
-
Troubleshooting Common Issues
Even experienced embroiderers encounter problems. Here are solutions to common issues:
- Thread breakage: Check tension settings, needle quality, and thread path for obstructions.
- Looping or bird nesting: Ensure proper threading and tension balance between top and bobbin threads.
- Skipped stitches: Replace dull needles and verify that you’re using the correct needle size for your thread.
- Registration issues: Properly hoop your fabric and stabilizer to prevent shifting during embroidery.
- Design puckering: Use appropriate stabilizers and adjust hoop tension to prevent fabric distortion.
-
Advanced Techniques for Professional Results
Elevate your embroidery skills with these advanced techniques:
- Appliqué: Incorporate fabric pieces into your designs for added texture and dimension.
- 3D foam embroidery: Create raised designs using specialty foam and techniques.
- In-the-hoop projects: Design and construct entire items within your embroidery hoop.
- Thread painting: Blend colors and use varied stitch directions to create painterly effects.
- Combining embroidery with other crafts: Integrate embroidery into quilting, garment construction, or mixed media art.
FAQs
Q1: What’s the difference between embroidery and sewing machines?
A: While both use needles and thread, embroidery machines are designed to create decorative stitches and patterns automatically. They typically have a designated embroidery area, can read digitized designs, and often have multiple needle options. Sewing machines, on the other hand, are primarily used for constructing garments and home décor items with straight or zigzag stitches.
Q2: How do I properly hoop fabric for embroidery?
A: Proper hooping is crucial for quality results. Start by placing your stabilizer beneath the fabric. Center your fabric over the inner hoop, then press the outer hoop down, sandwiching the layers. Tighten the screw while gently pulling the fabric taut from all sides. The fabric should be drum-tight but not stretched or distorted. For delicate fabrics, consider using adhesive stabilizer or basting spray to avoid hoop marks.
Q3: What types of thread work best for machine embroidery?
A: Polyester and rayon threads are popular choices for machine embroidery. Polyester is durable and colorfast, making it ideal for items that require frequent washing. Rayon offers a beautiful sheen but may be less durable. For metallic effects, use specialty metallic threads, but be prepared to slow down your machine and use a larger needle. Cotton threads can be used for a matte finish, particularly in projects aiming for a hand-embroidered look.
Q4: How can I convert an image into an embroidery design?
A: Converting an image into an embroidery design, known as digitizing, requires specialized software. While there are auto-digitizing options available, professional-quality results often require manual digitizing skills. Start with a clean, high-contrast image. Use your software to define stitch types, directions, and densities. Pay attention to the order of color blocks and consider how the design will sew out. For complex designs or if you’re new to digitizing, consider hiring a professional digitizer or investing in comprehensive training.
Q5: What causes thread breakage during embroidery?
A: Thread breakage can be caused by several factors:
- Incorrect thread tension
- Dull or damaged needles
- Poor quality thread
- Incorrect needle size for the thread weight
- Obstructions in the thread path
- Design issues, such as excessive density
- Machine timing problems Check and adjust these elements systematically to resolve persistent thread breakage issues.
Q6: How do I maintain my embroidery machine?
A: Regular maintenance is key to your machine’s longevity:
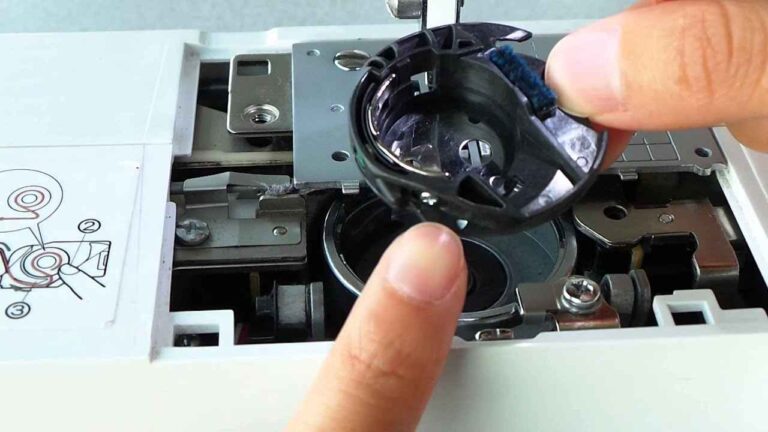
- Clean lint and thread debris after every project
- Oil the machine as recommended in your manual
- Replace needles regularly, typically every 8-10 hours of sewing time
- Use compressed air to clean hard-to-reach areas
- Schedule professional servicing annually or as recommended by the manufacturer
- Keep your machine covered when not in use to prevent dust accumulation
Q7: What stabilizers should I use for different fabrics?
A: Stabilizer choice depends on fabric type and design:
- Cut-away: Best for stretchy knits and dense designs
- Tear-away: Suitable for stable woven fabrics
- Wash-away: Ideal for lace and free-standing designs
- Heat-away: Perfect for delicate fabrics that can’t be washed
- No-show mesh: Great for lightweight fabrics where stabilizer might show through Always test your stabilizer choice on a scrap piece of your project fabric before starting your main embroidery.
Q8: How can I improve the quality of my embroidery stitches?
A: To enhance stitch quality:
- Ensure proper tension settings for both top and bobbin threads
- Use high-quality threads and needles appropriate for your project
- Properly hoop your fabric with the correct stabilizer
- Adjust your machine speed – slower speeds often produce better results
- Regularly clean and maintain your machine
- Choose designs appropriate for your fabric type and weight
Q9: What are the best practices for embroidering on challenging materials like leather or velvet?
A: For leather:
- Use a leather needle and heavy-duty thread
- Opt for tear-away stabilizer or specialty leather stabilizer
- Consider using a Teflon foot to prevent sticking
- Pierce holes in the leather first for dense designs
For velvet:
- Use water-soluble topping to prevent stitches from sinking into the pile
- Choose a cut-away stabilizer for support
- Gently brush the pile after embroidery to restore texture
- Consider using a hoop alternative like magnetic frames to avoid crushing the pile
Q10: How do I create multi-hoop designs for larger projects?
A: For large designs requiring multiple hoopings:
- Use embroidery software to split your design into sections that fit your hoop size
- Mark registration points on your fabric to align subsequent hoopings
- Consider using a basting stitch around each section for added stability
- Take care to match the orientation and position of each section precisely
- Use floating techniques for projects that can’t be re-hooped, like finished garments
Conclusion:
Mastering your embroidery machine opens up a world of creative possibilities. By understanding your equipment, materials, and techniques, you can produce professional-quality embroidery that stands out.
Remember that practice is key – don’t be afraid to experiment with different fabrics, designs, and techniques. As you gain experience, you’ll develop an intuitive understanding of how to achieve the best results for each project.
Keep learning by joining online embroidery communities, attending workshops, and staying updated on new technologies and techniques in the field. With patience and persistence, you’ll soon be creating embroidery masterpieces that showcase your skill and creativity.
Related Posts
Discover relevant articles, tutorials, and tips to improve your skills and explore new techniques.
Stay inspired and connected to our embroidery community.
