Embroidery Machine Accessories You Can’t Live Without
Embroidery is a captivating craft that allows you to transform plain fabrics into works of art.
While your embroidery machine is the star of the show, having the right accessories can make a world of difference in the quality of your work and the ease of your crafting process.
In this post, we’ll explore the must-have accessories that every embroidery enthusiast should consider adding to their toolkit.
-
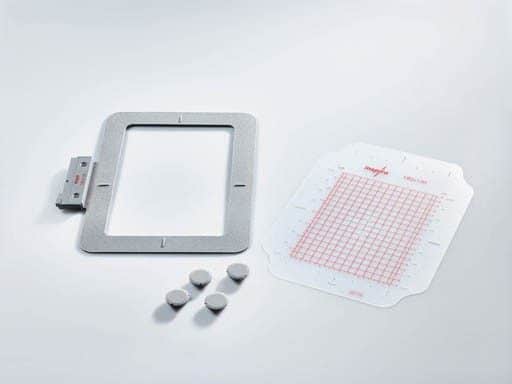
Embroidery Hoops
Embroidery hoops are perhaps the most essential accessory for any embroidery project. They hold your fabric taut, ensuring even stitching and preventing puckering.
Types of hoops:
- Standard hoops: Come in various sizes and are included with most machines.
- Magnetic hoops: Offer quick and easy hooping, especially for bulky items.
- Specialty hoops: Include quilting hoops, hat hoops, and sleeve hoops for specific projects.
Tip: Invest in a variety of hoop sizes to accommodate different project needs. Always ensure your hoops are compatible with your specific machine model.
-
Stabilizers
Stabilizers provide support to your fabric during the embroidery process, preventing distortion and improving stitch quality.
Common types include:
- Cut-away stabilizer: Ideal for knits and stretchy fabrics.
- Tear-away stabilizer: Perfect for woven fabrics and easy to remove after stitching.
- Wash-away stabilizer: Great for delicate fabrics and projects that require no visible backing.
- Heat-away stabilizer: Removes easily with heat, leaving no residue.
Tip: Keep a variety of stabilizers on hand to suit different fabric types and project requirements.
-
High-Quality Embroidery Threads
The right thread can make or break your embroidery project. Invest in high-quality embroidery threads for the best results.
- Polyester: Durable and colorfast, suitable for most projects.
- Rayon: Offers a beautiful sheen but may not be as durable as polyester.
- Cotton: Provides a matte finish, ideal for a vintage look.
- Metallic: Adds sparkle and shine to special projects.
Tip: Organize your threads by color and type for easy access during projects.
-
Embroidery Needles
Using the correct needle is crucial for achieving clean, precise stitches and preventing damage to your machine and fabric.
Key factors to consider:
- Needle size: Match to your thread weight and fabric type.
- Needle type: Embroidery needles have larger eyes to accommodate thicker threads.
- Sharp vs. ball point: Sharp for woven fabrics, ball point for knits.
Tip: Replace needles regularly, typically after 8-10 hours of stitching or at the start of each new project.
-
Scissors and Snips
A good pair of scissors is indispensable for embroidery work. You’ll need different types for various tasks.
Essential scissors:
- Embroidery scissors: Small, sharp scissors for trimming threads close to the fabric.
- Fabric scissors: Larger scissors for cutting fabric and stabilizers.
- Curved scissors: Helpful for trimming jump stitches in tight spaces.
Tip: Keep your scissors sharp and use them only for embroidery to maintain their edge.
-
Embroidery Software
While not a physical accessory, embroidery software can significantly expand your creative possibilities.
Software functions:
- Digitizing: Convert images into embroidery files.
- Editing: Modify existing designs or create new ones from scratch.
- Lettering: Add text and monograms to your designs.
Tip: Start with basic software that comes with your machine, then upgrade as your skills and needs grow.
-
Bobbin Thread
Using the right bobbin thread is crucial for balanced tension and a clean finish on the back of your embroidery.
Characteristics of good bobbin thread:
- Lightweight: Typically 60-weight or higher.
- Strong: To withstand the tension of embroidery stitches.
- Color-coordinated: Usually white or black to match most projects.
Tip: Pre-wind several bobbins before starting a large project to avoid interruptions.
-
Fabric Markers and Pens
Marking tools help you align designs accurately on your fabric.
Types of markers:
- Water-soluble pens: Marks disappear with water.
- Air-erasable pens: Marks fade over time or with exposure to air.
- Chalk pencils: Good for dark fabrics.
Tip: Always test markers on a scrap piece of your project fabric first to ensure they remove completely.
-
Embroidery Blanks
Having a variety of embroidery blanks on hand allows you to quickly create gifts or test new designs.
Popular blanks include:
- Towels
- T-shirts
- Tote bags
- Hats
- Handkerchiefs
Tip: Stock up on neutral-colored blanks that work with a variety of designs and color schemes.
-
Thread Stand
A thread stand helps prevent tangling and breakage, especially when using delicate or specialty threads.
Benefits:
- Reduces tension on the thread as it feeds into the machine.
- Allows for the use of larger thread spools.
- Helps manage multiple thread colors for complex designs.
Tip: A thread stand is particularly useful when working with metallic or slippery threads.
-
Design Templates
Design templates help you position your embroidery designs accurately on your project.
Types of templates:
- Plastic templates: Reusable and come in various sizes.
- Printable templates: Can be customized for specific designs.
- Target stickers: Help align designs quickly and easily.
Tip: Use templates in conjunction with fabric markers for precise placement.
-
Lint Brush and Tweezers
Keeping your machine clean is crucial for its performance and longevity.
Uses:
- Lint brush: Removes dust and thread debris from the bobbin area.
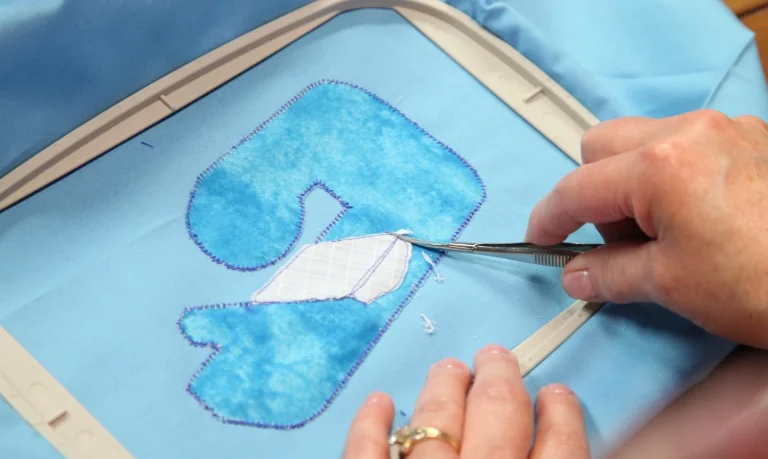
- Tweezers: Help remove small threads or fabric pieces from tight spaces.
Tip: Make cleaning your machine a regular part of your embroidery routine.
-
Thread Nets and Spool Caps
These accessories help manage thread feeding, especially for specialty threads.
Benefits:
- Thread nets: Prevent thread from tangling or slipping off the spool.
- Spool caps: Hold thread spools securely on the machine’s spool pin.
Tip: Use thread nets for slippery threads like rayon or metallic.
-
Spray Adhesive and Tape
These tools help secure stabilizers and fabrics in place during the hooping process.
Uses:
- Temporary spray adhesive: Bonds stabilizer to fabric without leaving residue.
- Double-sided tape: Useful for securing difficult-to-hoop items.
Tip: Always use products specifically designed for embroidery to avoid damaging your machine or fabric.
-
Storage Solutions
Proper storage keeps your accessories organized and easily accessible.
Storage ideas:
- Thread racks: Keep threads visible and tangle-free.
- Bobbin organizers: Prevent bobbins from unwinding.
- Craft carts: Mobile storage for frequently used items.
Tip: Label storage containers clearly to save time when searching for specific items.
Conclusion
While this list of embroidery machine accessories might seem extensive, each item plays a crucial role in creating beautiful, professional-looking embroidery.
As you develop your skills, you’ll likely find that these accessories become indispensable tools in your crafting arsenal.
Remember, you don’t need to acquire everything at once. Start with the basics – hoops, stabilizers, threads, and needles – and gradually add more specialized accessories as your projects and skills evolve.
With the right tools at your disposal, you’ll be well-equipped to tackle any embroidery challenge and let your creativity soar.
Related Posts
Discover relevant articles, tutorials, and tips to improve your skills and explore new techniques.
Stay inspired and connected to our embroidery community.
